|
Front End Rebuild
Source:
http://www.impalassforum.com/vBulletin/showthread.php?t=264328
By Ryan DC (SimplyTheBess)
I'll start
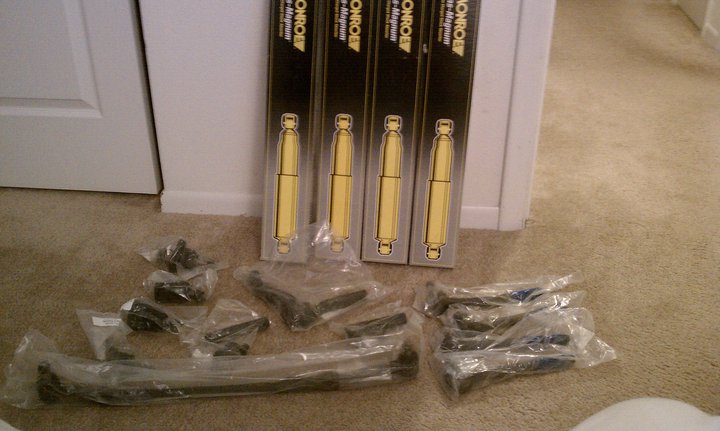
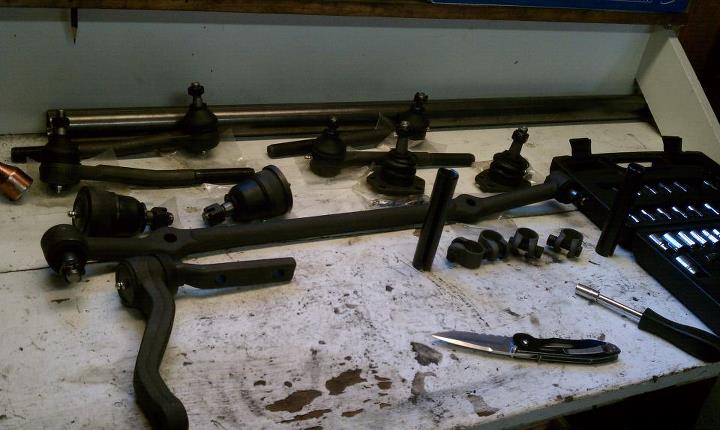
off by talking about the parts.
I order power performance/Proforged Front end Rebuild Kit -->
http://www.proforged.com/parts/1978-...-Front-End-Kit
from a group purchase on the forum.
I went with Monroe Severe Service shocks.
Moog Sway bar links
Moog upper control arm shaft kits (Sleeve actually was rusted to
through rod) ---->http://www.oreillyauto.com/site/c/de...2938&ppt=C0106
I'm also replacing the wheel bearings and seals while I'm in there
along with the rotors and brake pads. Haven't determined which ones
I'm going to use yet. (EDIT: Decided to go with stock rotors and EBC
Redstuff brakepads)
I'll try to explain the pictures as best I can but as I had a lot of
help on this project and I was trying to put in my wrench work time
while still absorbing as much wisdom from them while not getting in
their way.
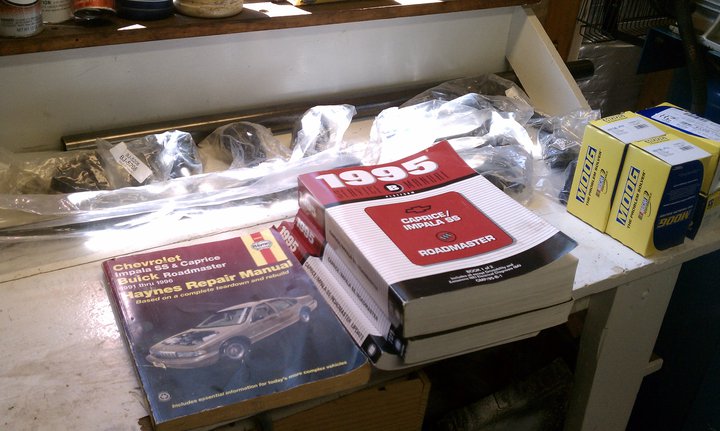
1. Read. Read. Read. Thanks for the good birthday present by the way
Dad!
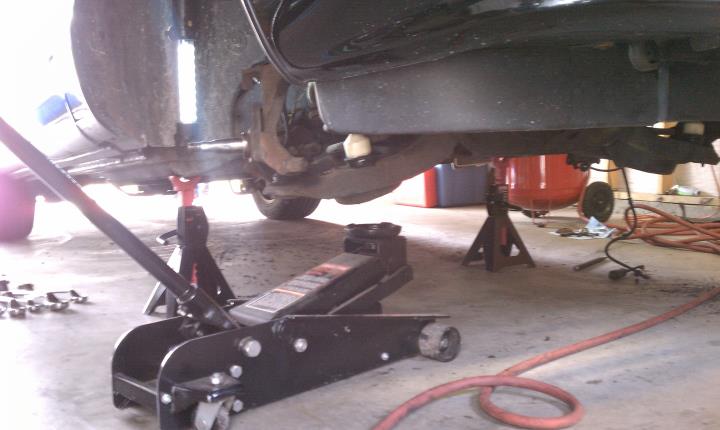
2. Lift, jack stands, Knock the wheels off. Make sure the jack stands
are secure cause your gonna be beating on the car pretty hard. Safety
first!

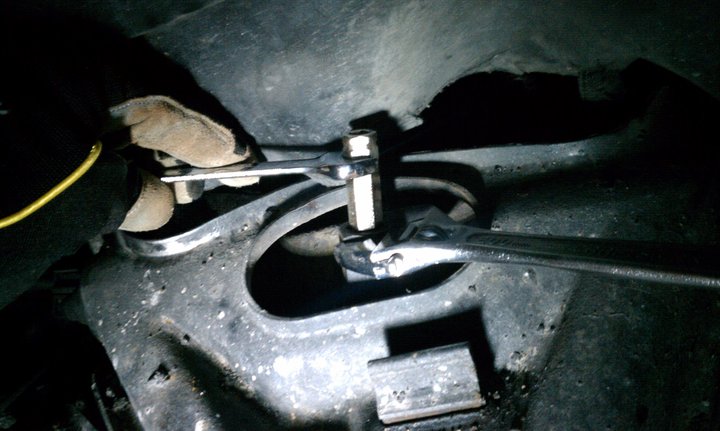
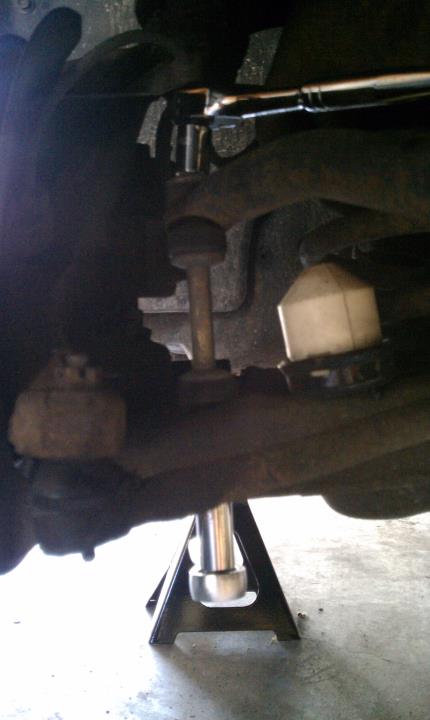
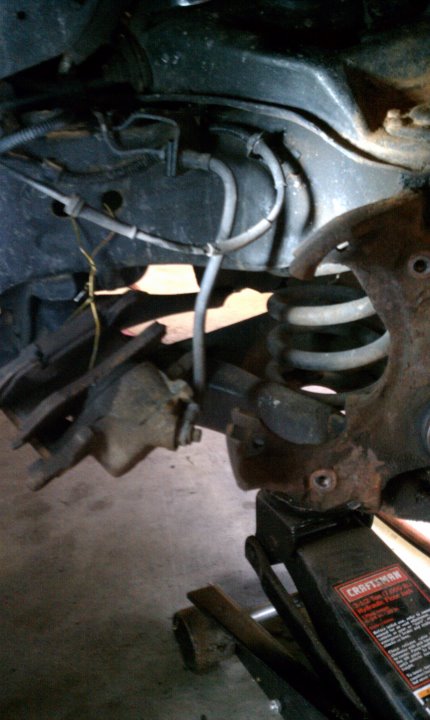
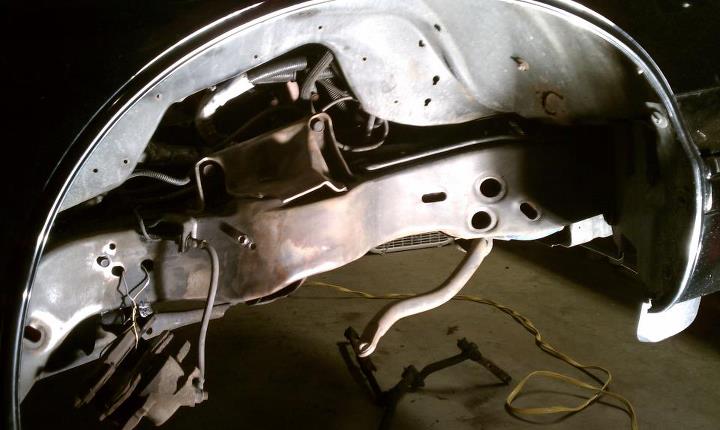
3. Remove the shocks. I started with the lower bolts.

Then the top was a real Pain In the butt till I was turned on to this
little tool. It is SSweet.

The inside piece is shaped like an oval just like the top of the shock
is. This allows you to hold on to the shock while you turn the nut.
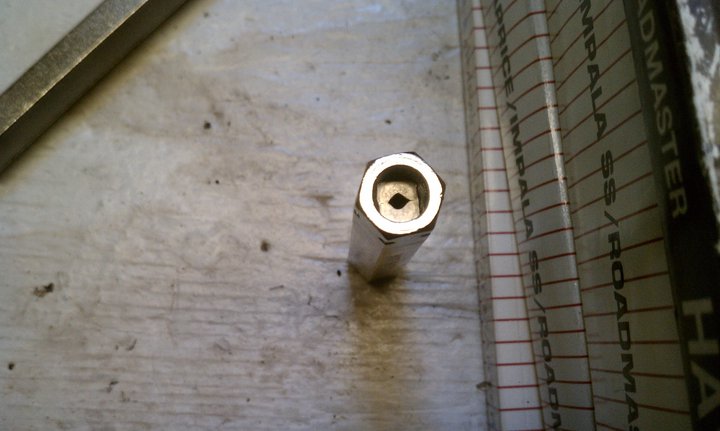
It's also tall enough to get out of the control arm through the top so
your not fighting it in that little hole.
4. Remove the sway bar links
5. The next step was to to take off the braking system and rotors. I
just installed the stealth bolt so I really didn't want to flush the
brakes again so we just took a metal coat hanger and hung them out of
the way.
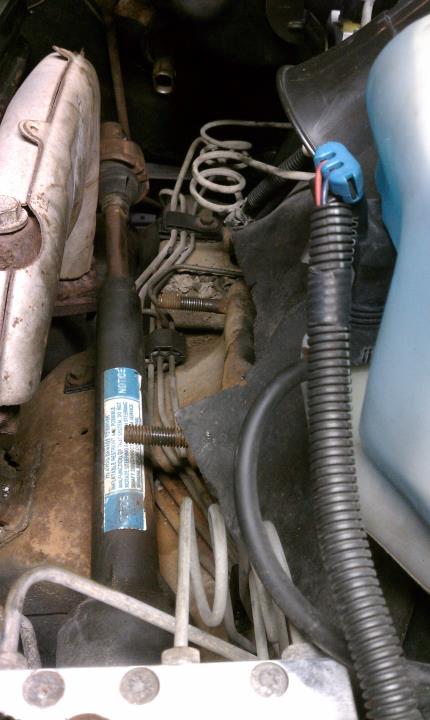
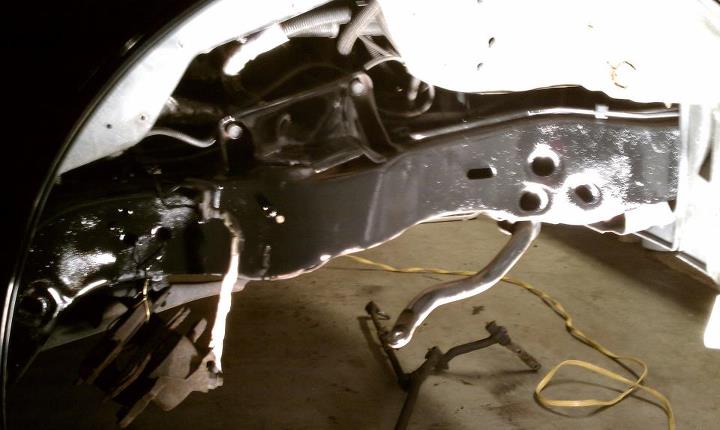
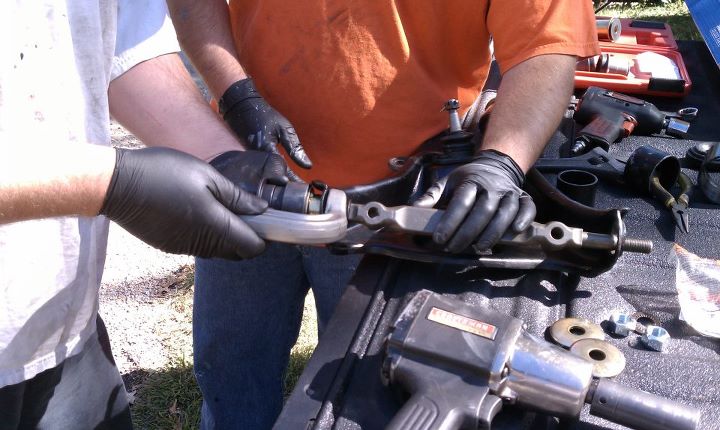
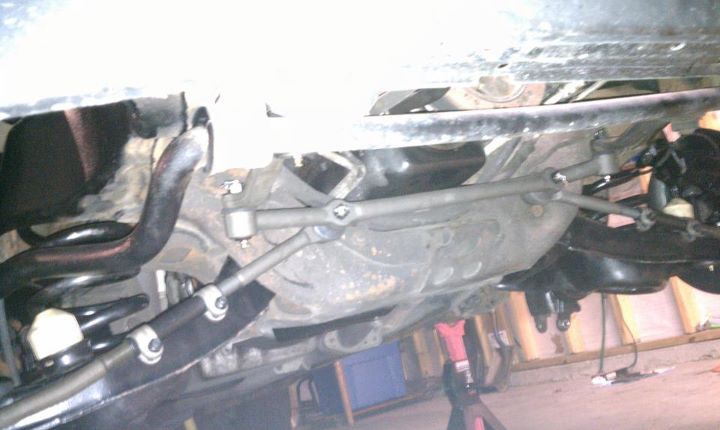
6. Sometime during that we started taking off the steering linkage and
busting the ball joints loose. Wasn't too bad only had a ball joint or
2 that took a beating. Sorry don't have pics of this only the whole
linkage out.

It's important to keep this together because you are probably going to
try to drive it to the alignment shop when you are done and so you
want to build the new linkage system as close to the old one as
possible. Always measure nipple to nipple and DO NOT count threads.
threads on replacement parts may not be the same size or length as
OEM.
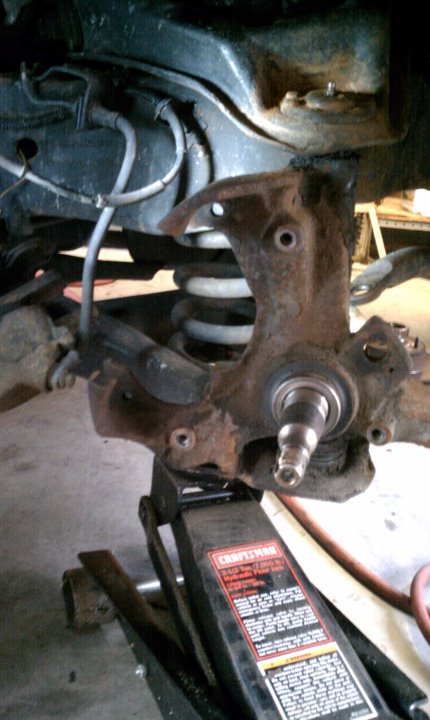
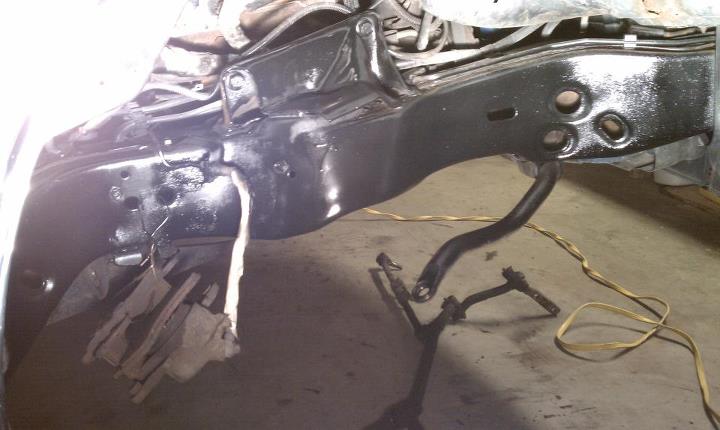
7. remove the Spring(Carefully). We used the coil spring compressor
tool from O'Rielly's and it worked out okay. If anything I wish the
rod was a little bit longer (don't we all) but it went okay. I
remember we loosened the nut on the ball joint by the spindle a little
bit and used the spring to help bust it loose. Then we pressed the
spring up from under the hood with an impact and broke the lower ball
joint loose and kicked the lower control arm out of the way and
brought the spring back down.
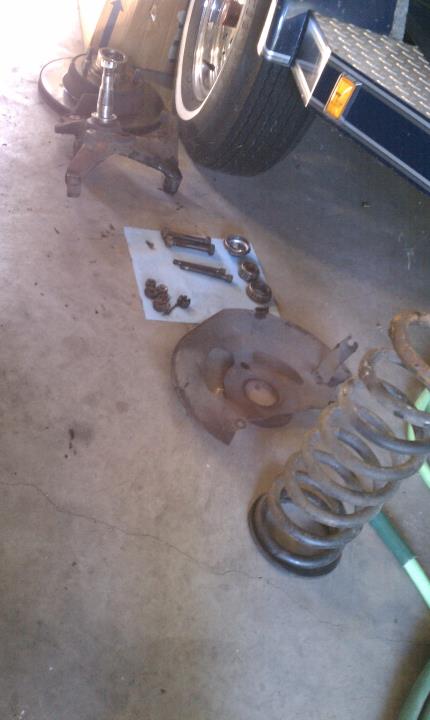
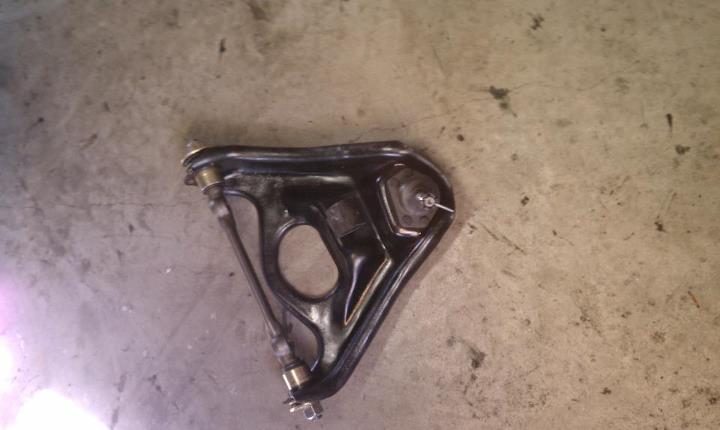
8. With the spring out that only left the upper control arm to get
out. Those nuts are a pain to get out and I recommend chasing them
down once you get the nuts off. Both sides sucked to remove. On the
passenger side you are fighting the AC lines and it's just hard to see
what you are trying to do. On the driver side you have to remove the
bolt on the steering shaft but even then trying to get the arm past it
take a certain kind of pushing in an upward movement and getting
lucky.
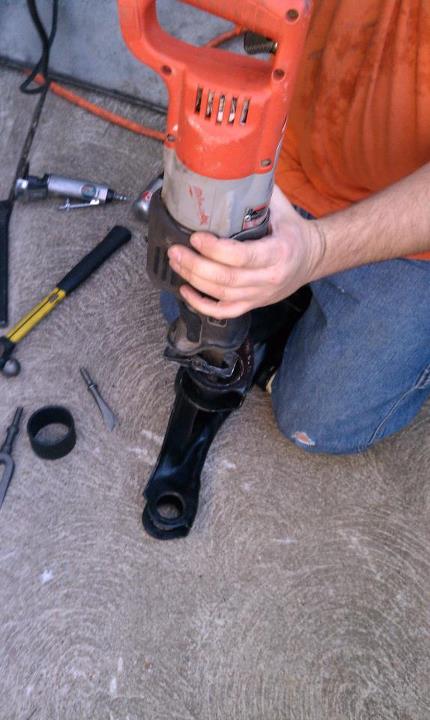
9. With the control arms out you get to pushing the rods and bushings
out. I'm not really sure what the name of the tool us but I'll call it
a big ass C-Clamp so maybe a press tool? Not sure. Either way we did a
combo on the uppers to heat up the bushings with a torch and pressing
them. Between the 4 of us we came up with a combo of ideas that
worked. On the lowers we torched the other side of the metal of the
bushing evenly until the bushing started to bubble while pressing with
a pry bar from the inside OUT. The bushings are tapered to shoot OUT
ward so keep this in mind because they often are on fire when they pop
out. We used an old rotor to contain the rubber bushing from flying
into the garage or yard.

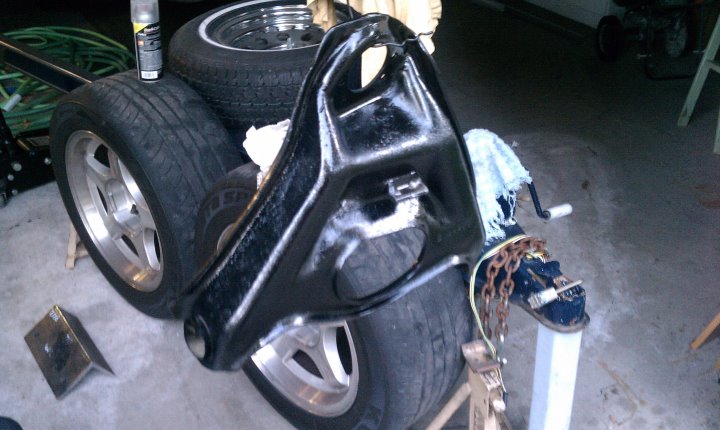
10. If your car is a rust bucket like mine is this is a good time to
do some touch up painting on your frame, control arms, spindle,
spring, and anything else you want to touch up. Some people like to go
crazy with this but I maintain that unless you are going to never
drive the car again, it's going to get dirty within 2 weeks and your
drive yourself nuts cleaning the underside. So I'm just going with
Black. This is also a good time to do other things while your this far
along such as brakes, rotors, wheel bearings and I'm sure a lot of
other stuff.
That is it for now, I'll be removing rust and dirt from the control
arm and other pieces and repainting for a couple of days while I wait
for a few parts and then start putting things back together again.
Again just want to give out shout out to my GRAIL friends who helped
me out thus far and in the future. Dana & Chris, for help with the
wrench work and bringing over the tools I didn't have. David for his
help over the phone and picking out parts. And like most things in
life, wouldn't be possible without dear old Dad. Hope this helps
someone and more pics will come in a few weeks. (hopefully looks
cleaner too!)
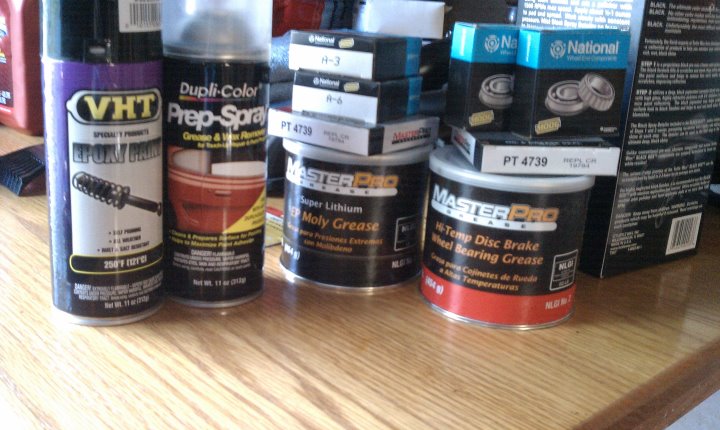
painting
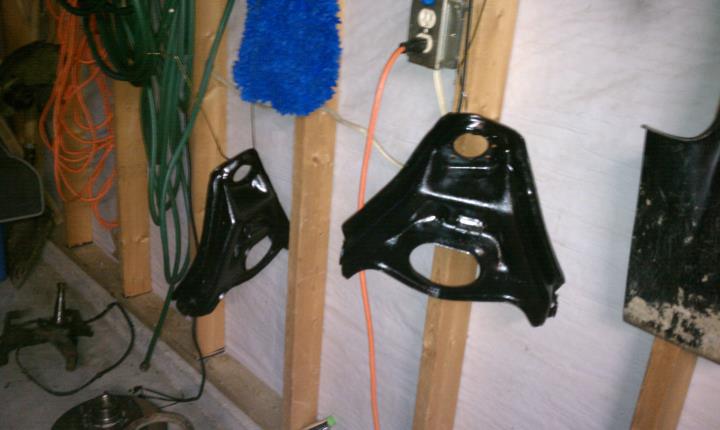
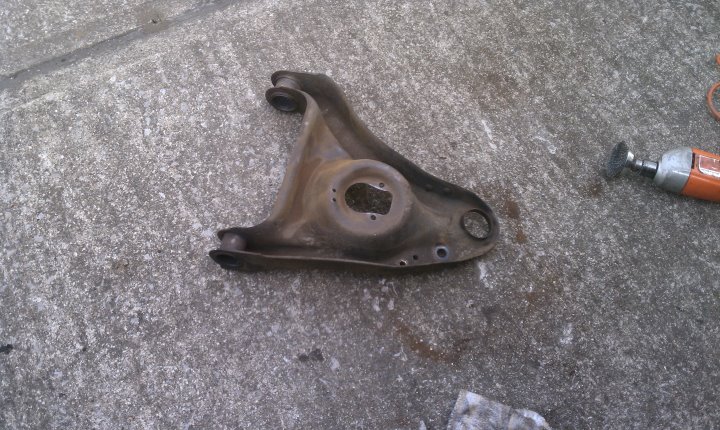
Things are going slower than I wanted but really taking my time with
the prep work. I'm sure I'll thank myself for that later.
This is after a little bit of prep. I've been taking them down till
they are almost rust free.
Got one arm done today.
I've been putting in about 2-3 hours a day this week on this took
yesterday off, arm was killing me from all the wire brushing.
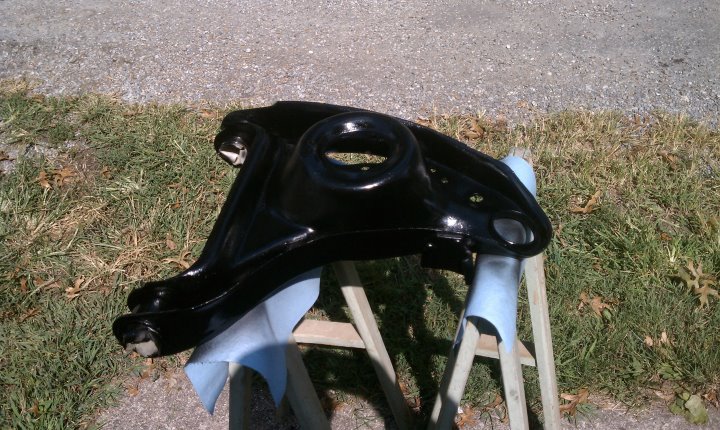
Got the first coat on the arms. They were looking okay.

Got the springs done.

And got part of the wheel well done.

Please note that the painting is more to keep the rust somewhat under
control more so than to look pretty. and yes I know about the spot in
the wheel well. That's going to have to get patched.
Got the other side of the frame done.

And the spindles

Picked up some more parts.

Just have the brake calipers to paint and pick up some new rotors and
brake pads and I'm ready to put it back together again!
I wasn't planning on replacing all of this but I already had all these
parts off and figured now was a good time.
This isn't so much a suspension item as much as a "while I was here
and it needs to be done" item.
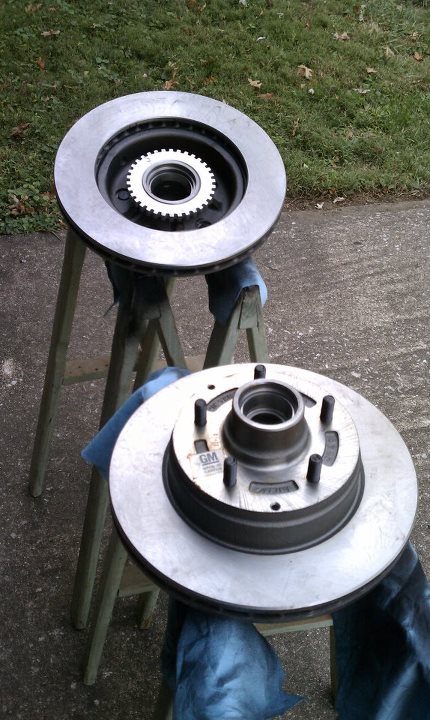
Got some new stock rotors, mine were not so much thin as they were
just severely rusted. $62 a piece from AC-Direct.com. Got the part #
off RockAuto.
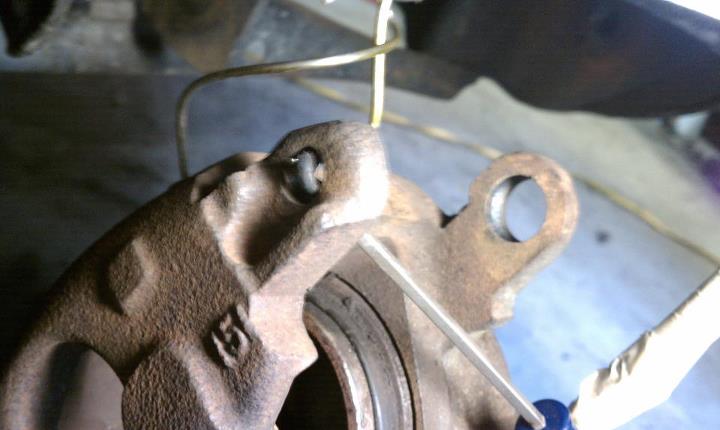
I also noticed my caliper slide pin sleeves had a lot of play in them.
On one side it took almost no effort for one of them to fall out.
bought this kit from RockAuto.

I removed the old ones.

And installed the new ones.

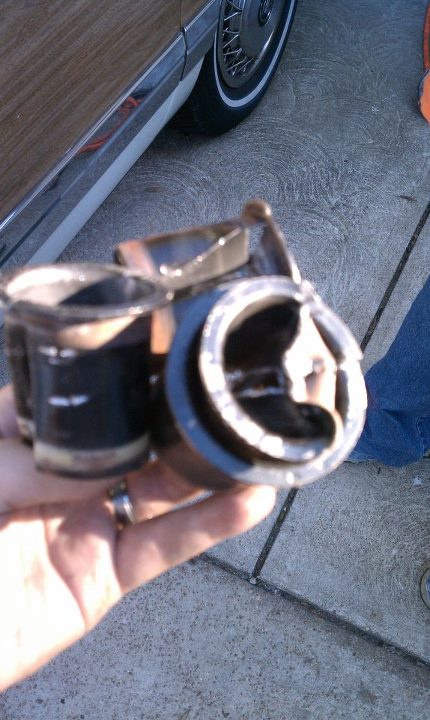
Now I want to talk about these little O-Rings and sleeves... On the
passenger side it took me 5-10 minutes, was very easy and ran into no
problems.
The driver side probably took me about an hour and half. Why, I don't
really know. The O ring kept wanting to pop out of the little groove
that it sits in. (See below picture)
I suspect, the reason was that the old gasket had actually bonded to
the metal and that there was still some stuck in there after removing
the old one so the new gasket couldn't "seat" properly. After about 45
minutes of frustration I took a dremil tool and stuck it up in there
cleaned her out real good. That made it better but still ran into
problems.
I ended up put the caliper sleeve on the caliper bolt to help align it
so that I was pushing exactly down the center of the gasket and that
is what eventually got it on. Again, I had no problem with the
passenger side so I don't know why it was such a PITFA but hopefully
my explanation makes that easier on someone someday.
Hoping to get the front end back together this weekend if I can get my
buddies back to help out.
alright so yesterday from about 1-midnight was spent on this. Again
had the help of my GRAIL buddies Dana and Chris for whom this wouldn't
have gotten done this year more than likely.
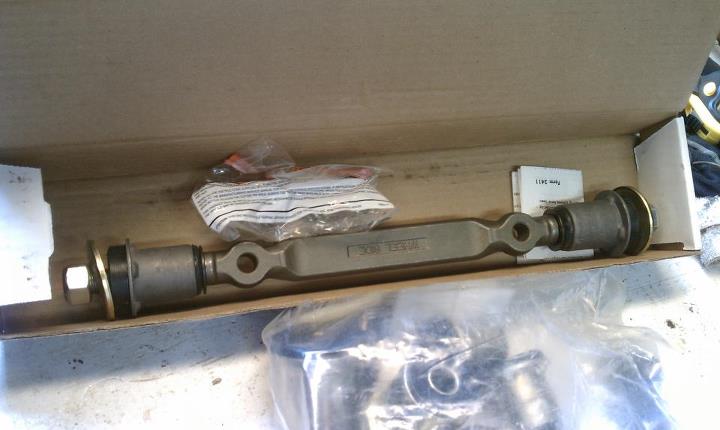
Lets start off with the suspension pieces. I took those out and spread
them around so you can see what you get. Again this is the kit from So
FaSSt (www.Proforged.com)
We started by tackling the upper shaft kits, wasn't too hard with a
press and air tools. We also got the ball joints in now as well.
This one is ready to go back in the car.
The lowers were a PITFA. I didn't look to see that the sleeves
actually came with the new lower bushings so the old ones had to go.
Be careful when you do this that you don't cut the control arm or you
are going to be really pissed. Don't try to cut through it just enough
that you can bend it.
Also helps to cut the lip of the sleeve with a small cutting wheel.
Again, don't notch into the control arm.
Dana scored "First blood"

Old sleeves. The camera was more interested in the Buick Roadmaster
though apparently.
Got the control arms in. Again, it's a pain to get the upper shaft
kits back on the bolts with the steering shaft in the way and the
lower control arm we had to beat the leaves of the frame open just a
bit to get them pressed in. MAKE SURE YOU PUT THE SHIMS IN!
Here we have the spring being held up with the spring compressor while
we get the spindle on.
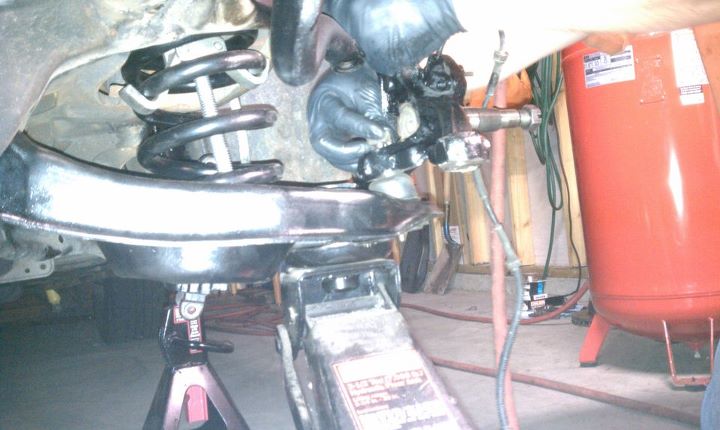
This side is ready to bring the jack back down.
We started on the other side. The spring came off the clamps about 10
seconds after this picture, VERY SCARY. Not really sure why but it
just goes to show you that you need to be careful during this part. I
guess this is a good time to also mention that you want to make sure
the spring is properly indexed into the lower control arm. In the
lower control arm there are two small holes in the bottom and a groove
where the spring should sit. You want the spring to be close to this
when putting back in WITH OUT going past the index point. Do that and
your car will be higher on one side.

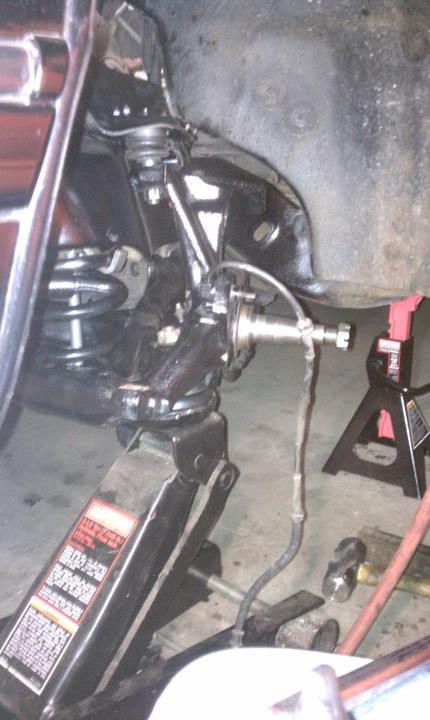
With the spindles on we started with the dust shields and getting the
ABS sensor wiring back where it needed to be.

Paint job isn't the best but better than looking at rust. Maybe one
day I will have the knowledge to do an off the frame rebuild but that
is many years away and at age 27, I'm okay with this.
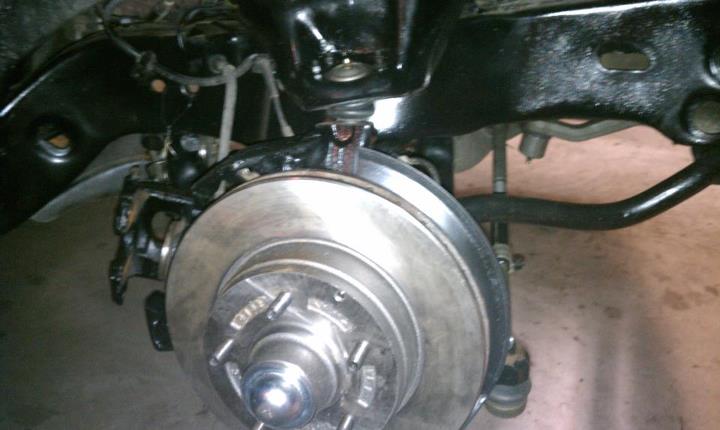
I had new bearings and seals for the new rotors so we packed those.
Basically just take a glob of high temp wheel bearing grease and press
the bearing into your hand over and over until you see it coming up.
You could have a tool to do this like Dana has but left at his house
so I could get the "joy" of doing it the old fashion way. Make sure
you also grease the inside of the rotor a bit, clean off the back of
the rotor with brake cleaner and try not to touch it after that.
(Grease + brakes = not good)
While you tighten down the rotor to the spindle, make sure you keep
rotating the rotor as you tighten and then once it starts getting
tight, go 1/4 turn and then look for the hole in the spindle for the
cotter pin. Unlike the suspension, if the hole isn't perfectly lined
up, go LOOSER not tighter until you can get the cotter pin in.

Even got a new dust cap, I went all out on this!
We got the steering linkage in before the rotors but after the springs
were installed. make sure you follow the torque settings and again,
try to get the new linkage to match the old linkage as much as
possible. Just makes it easier on the alignment guys. Grease all the
ball joints as there is 'some' in them to start with but you will want
to add some more.
I'm still waiting for my brake pads to come in, and then it is just
slapping those on there and taking it to the alignment shop. Depending
on how bad the alignment is I might have to put it on a trailer. I'll
take more pictures when I go back over to the garage but this is the
best you will get for now.
Nothing exciting going on last night. Just put the shocks back in and
cleaned up the garage a bit. Probably do some touch up tonight and
debate if I want to put the old brake pads back on or just wait for
the new ones to finally get to the vendor... Least they are nice
enough to give me overnight shipping when they do get the parts in.

Well my brake pads aren't coming in until the 17th... (1 month for
brake pads seriously wtf...) so I slapped the old pads back on and put
the wheels back on and took her for a ride around the block.
(Basically to see how bad my alignment was and if I could drive it to
the shop or needed to get the trailer.)
Actually went pretty good. Wheel is off maybe an 1/8 of a turn but it
was not squealing down the road or pulling hard to one side. Should be
fine if I take the side streets and keep my speeds low.

Just want to say thanks to everyone for the support, suggestions, and
help with this project. Also a special thanks to Dana and Chris, Dave,
Dad and my other fellow GRAIL members.
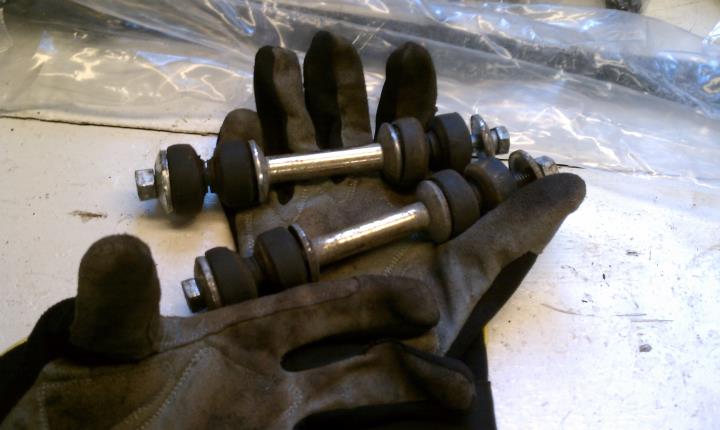
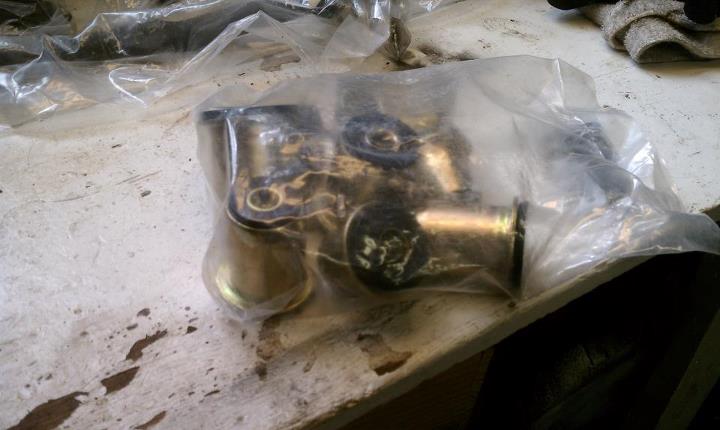
A lot of people are asking what bushings I went with so....
Note: These come with the sleeves already on them. |
|
|