Source:
http://www.impalassforum.com/vBulletin/showthread.php?t=271887
By Ryan DC (SimplyTheBess)From the makers
of
Simply's Front end Suspension Rebuild
comes another thread on Installation of
Tri-Y headers & Hi-flow CATS from Clear Image Automotive. Like most
things this is probably going to take 2x to 3x longer than most people
as I will probably get distracted by other things I want to do while
I'm in there (If you saw my front end rebuild thread you know exactly
what I'm talking about.) I already plan on replacing the plugs and
plug wires but not sure how much of that I'm going to show.

Lets get this party started.
1. Read, read, read, read.
You can't go into everything like a boss, you
gotta read up. Some good tips here.
http://www.clearimageautomotive.com/b_and_d_body_headers_installation_tips.php
Being
familiar with your exhaust system is going to help out too.
2. When you don't know Ask.
There are no stupid questions if you honestly don't know. For example,
I have a 94 Impala SS so I only have (2) o2 sensors. I honestly just
sent an email to Dan @ Clear Image asking what I should plug the other
openings with.
3. Tools/Parts you will need.
- Tri-Y headers with their
hi-flow CATS. These start and stop at the stock position so they
just bolt right up, no trips to the exhaust shop necessary
- PB Blaster or approved equal
- Sockets, ratchet, beverage of
choice, patience,and socket extensions
- A Good compact light
- Jack Stands etc..
- Exhaust gaskets
- 14MM, 1/2", 9/16" regular and
deep sockets (Seems most of the bolts are these)
- variety of extensions
- Cheater bar
- creativity
- Patience
4. Safety.
I've never died but it looks painful, being crushed underneath the car
is not what I want for you or me. So use jack stands and be safe.
O AND DISCONNECT YOUR BATTERY OR YOU WILL RANDOMLY TOUCH YOUR STARTER
WITH SOMETHING AND FRY YOUR ***. Ask me how I know.

5. Say hello to my little friend!
This should almost be step 0. honestly soak the bolts as soon as
possible to give yourself a chance. You should have bought stock in
this stuff because it makes your life a lot easier.
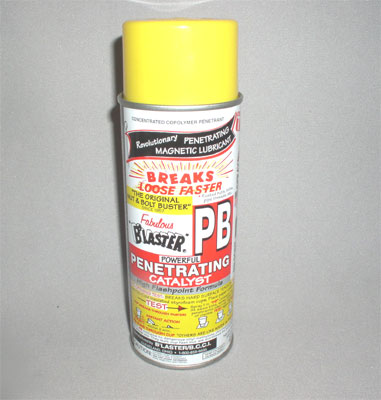
6. What to soak with PB Blaster.
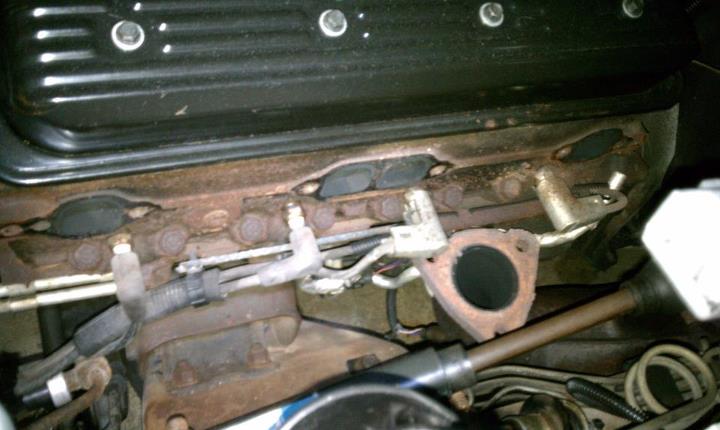
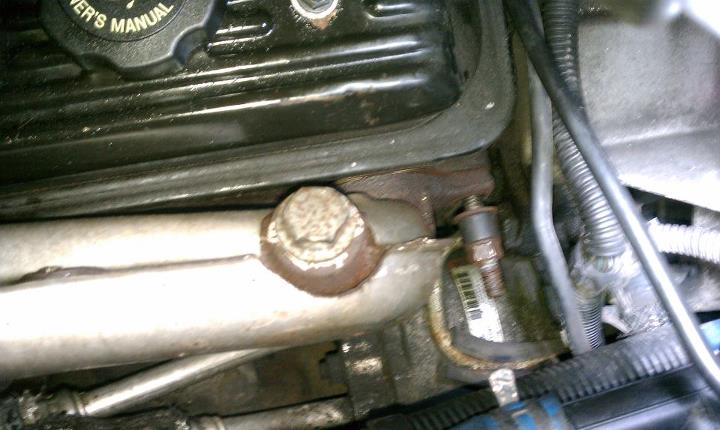
Each exhaust manifold has (6) bolts connecting it to the block. The
passenger side also has some fun alternator brackets and EGR valve BS
you get to play with too. You are going to have to fight both under
the hood and in the wheel wells to get to them. You are going to want
to remove your wheel & wheel well skirts for better access.
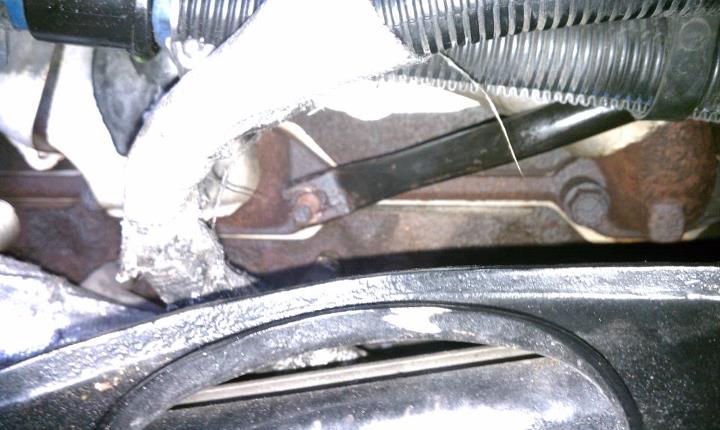
This is a pic of the driver side exhaust manifolds. look at how nice
my new upper control arms look! You can get to 5 of the 6 bolts from
here though you can only see 3 in this picture.
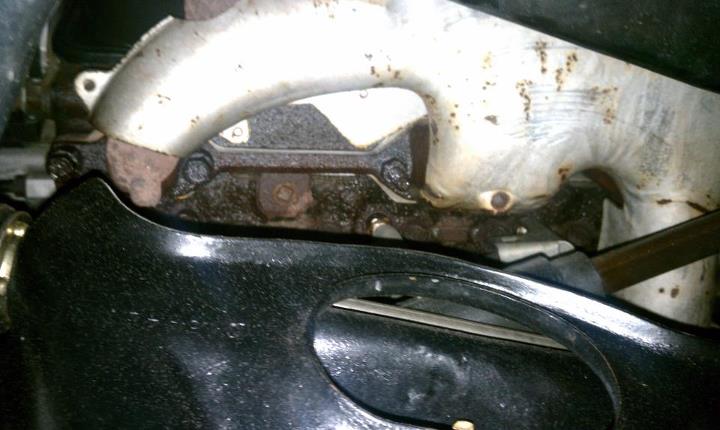
Last bolt in the rear of the block is best attacked from above. Can't
even get a good pic of it but you'll see it back there.
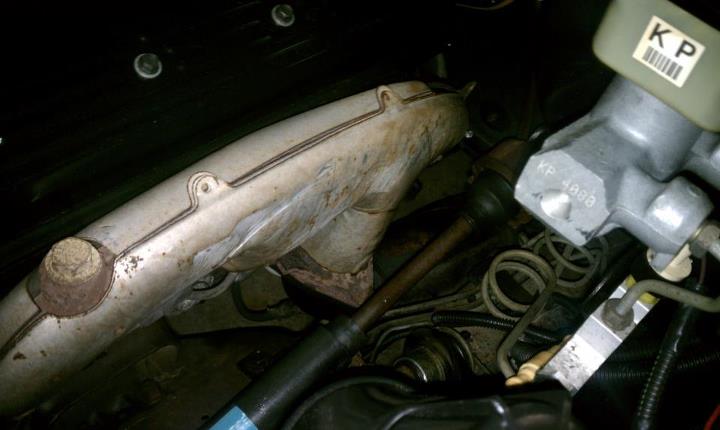
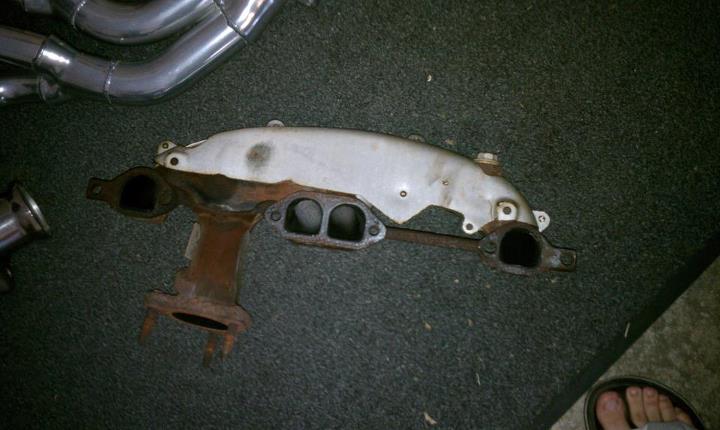
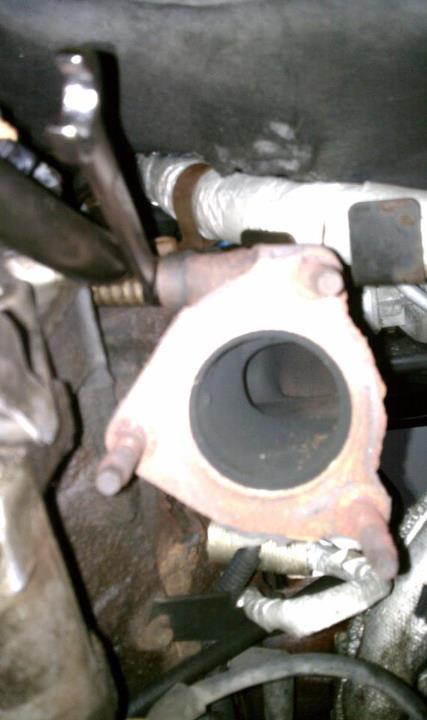
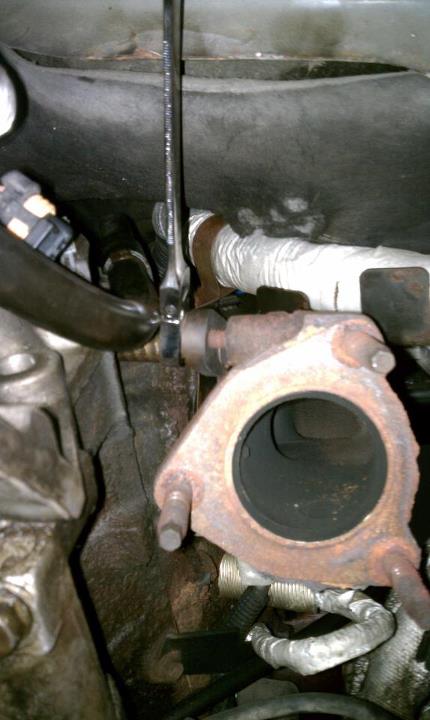
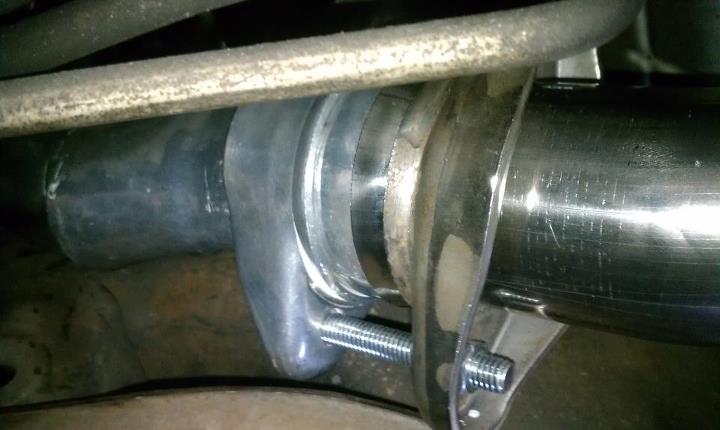
So those are the bolts for the manifold. Now you need to get both ends
of the CATS. This is the connection between the CAT and the manifold.
3 bolts here to soak. (forgot the 3rd one and had to go back to it
after seeing this pic)

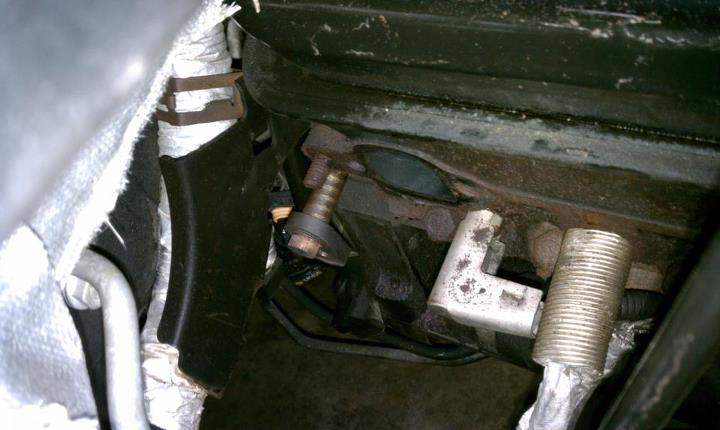
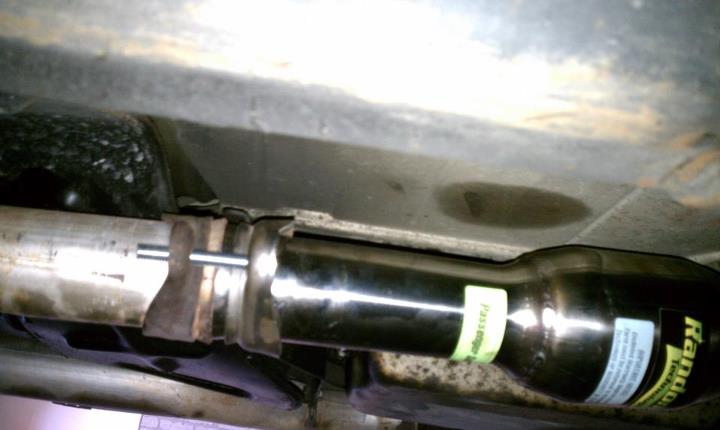
And the ones at the end of the CATs (2) bolts here at least on mine, I
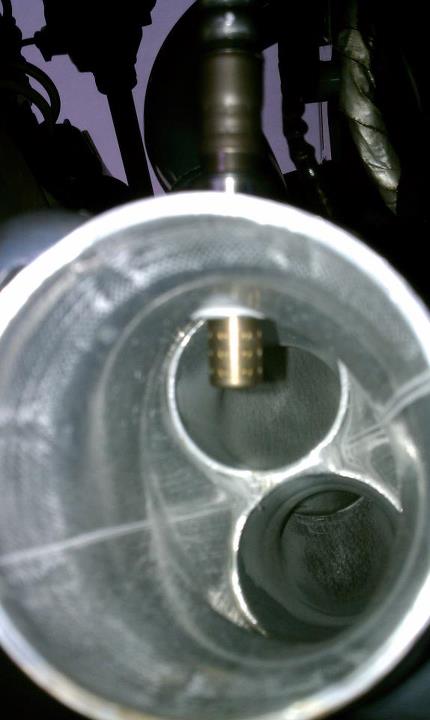
don't have a stock CAT back exhaust so yours may be different.

Passenger side is similar except you have the EGR valve to mess with
and alternator brackets as well. Also, your rear exhaust manifold bolt
is probably broke (Almost every person's I talk to is) just like mine.
You will get to see me struggle with that soon.
Driver side manifold bolts all broke loose without incident. I then
started on the driver side manifold/cat connection. I got 1 nut
completely off before the wife said we were going to the in-laws for
dinner.
So far I've only had to use 9/16 sockets or 14MM. both regular and
deep socket with a variety of extensions and cheater pipe. I used a
flat blade screw driver to beat some of the rust off of the nut on the
cat so I could make good contact with it.

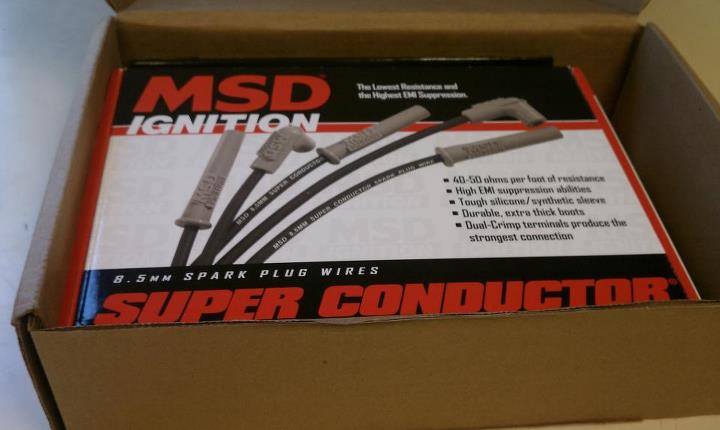
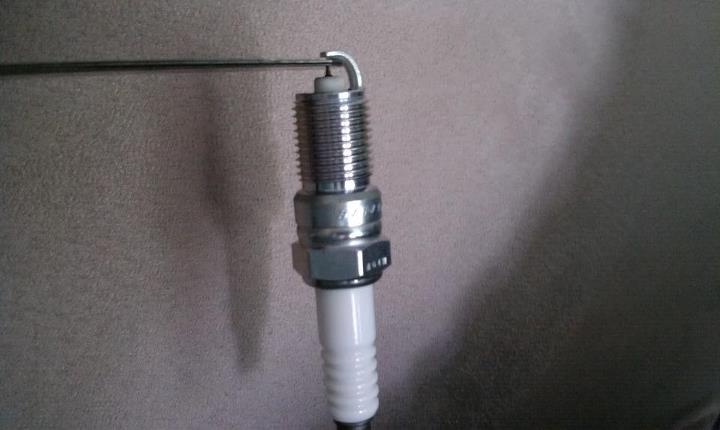
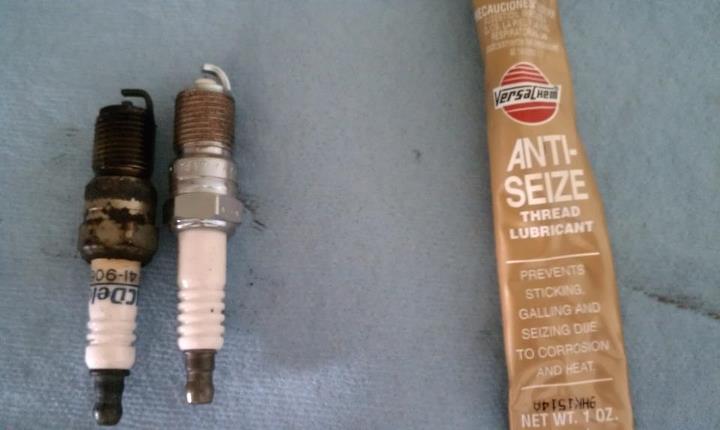
Sparkplug wires came in. Part # 32153 MSD
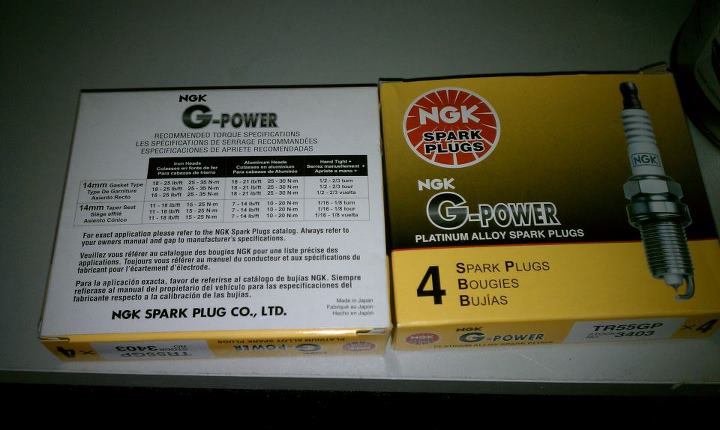
I went with the NGK spark plugs - Part #3403 NGK
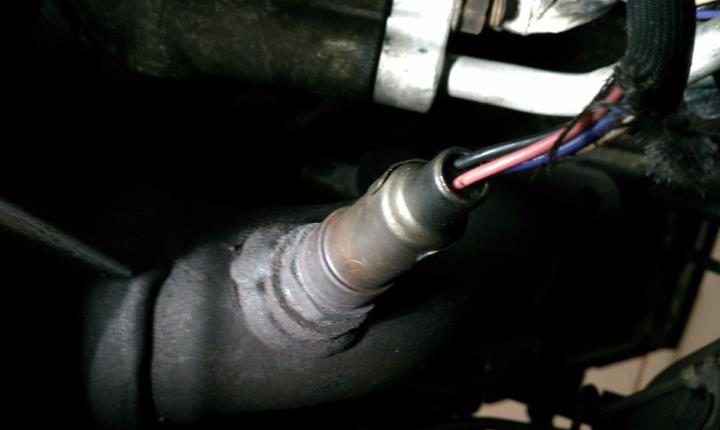
Driver side is off with little to no incident. The o2 sensor didn't
want to come out so I took off the electrical connection and will
fight that after letting it soak in PB Blaster.
Things are going SSlow... separated my sternum on Thursday so
didn't want to overdo it on Saturday plus I picked up a "Free"
lawnmower if I could get it running which "The Fooser Guy" came over
and helped me with. Then we got some nasty hail storms which dented
the hell out of the wife's new car and flooded the garage. (Glad I
noticed before the new headers sat in water all night!) Also the rain
got into some outside electrical sockets and were tripping the circuit
breaker all night so I've got to get some weatherproof boxes... Just a
lot of 1st world problems going on lately so I doubt I get much
further than this this weekend.
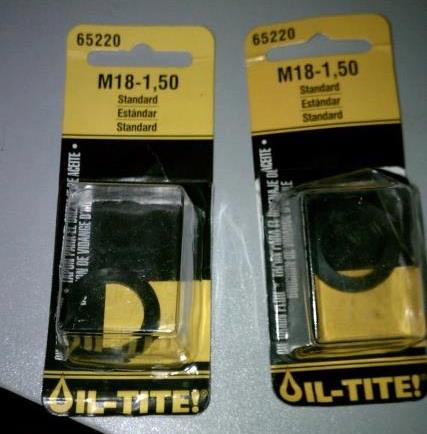
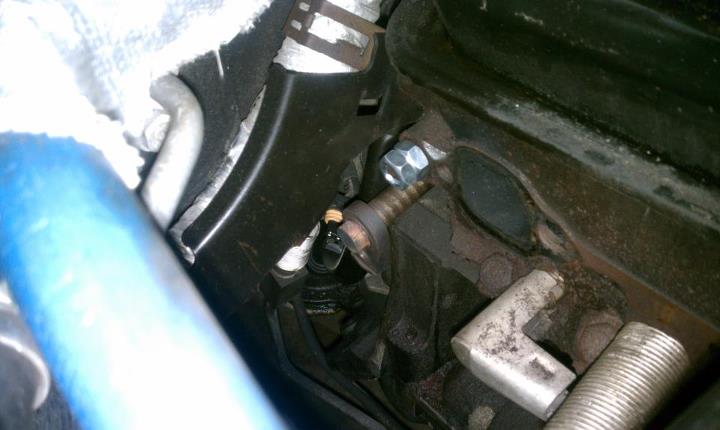
Well had to run to the parts store to get some outdoor outlet covers
so I took my cats with me. Ended up at Autozone and found an oil drain
plug that should work. It threaded in very tight and worse case I'll
take it out and put something else in there. I did not install the
plastic washer as I figured it would just melt.
was in the house watching baseball so decided to gap my spark plugs
during commercials.
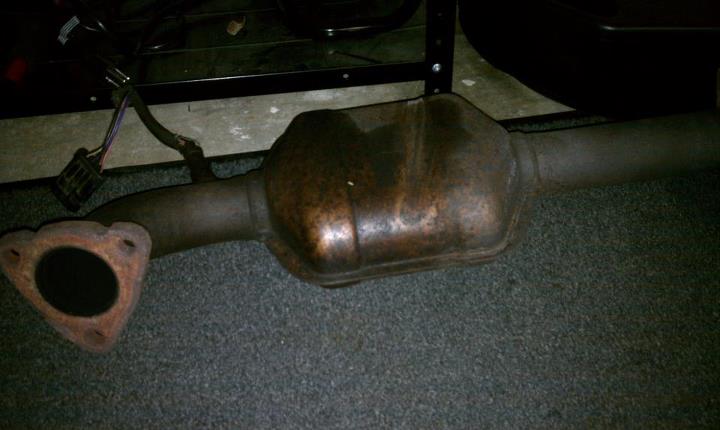
Removed the passenger side Cat tonight. Little bit of advice and a
funny story. When you remove the cat, make sure you get the o2 sensor
disconnected either at the wire, or at the bolt. Here is what happened
to me. I removed the 3 bolts to the manifold, and crawled back and was
removing the last bolt to the rest of the exhaust and was so
concentrated on NOT letting the pipe smack me in the face, I neglected
to protect my boys... Front part of the cat dropped down and smacked
me right in the balls. Then to add insult to injury, found I didn't
disconnect the o2 sensor, fought that off but found the wires were
zipped tied together and my side cutter were in the tool chest... so
here I am under the car, balls crushed and I can't drop the cat down
because it would just hang on the wires so had to lift the cat back up
and stick a bolt in it long enough to grab the side cutters, check my
balls, toss on my cup, and crawl back under the car.
I really had a bad day tonight but it's funny today.
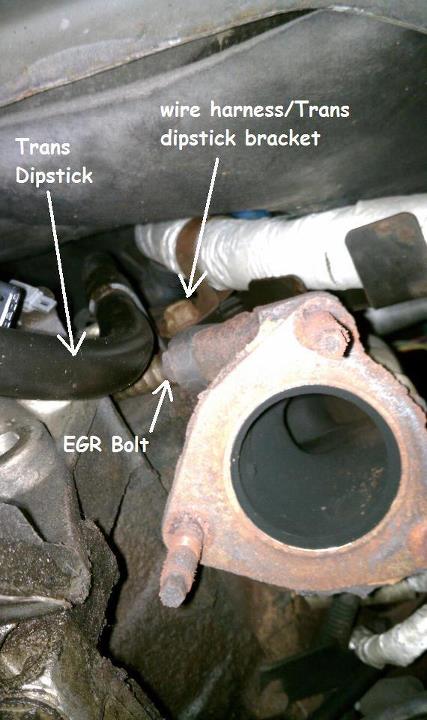
So driver side was off and started on the passenger side. I got a
little frustrated yesterday fighting the EGR Bolt and didn't know
which way to go. After cooling off a bit and getting some responses
from the forum, I decided to loosen up the manifold bolts enough to
pull the manifold away from the block a bit. It worked pretty well.
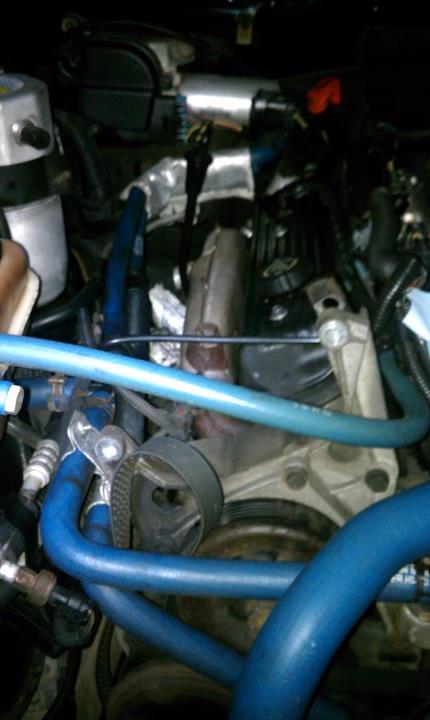
Here is what I was fighting. The EGR Bolt is about 1/4" away from the
transmission dipstick and because of the angle, I couldn't get a
wrench or it solidly. There wasn't enough room to get a box end wrench
or it either as the transmission dipstick would NOT flex enough. I
thought about removing the transmission dipstick by removing the
bracket up above but getting to that was a pain and I didn't want to
mess with all that. As mentioned I basically move the exhaust manifold
to the right in this picture by loosing up the manifold bolts.
Take the belt off the alternator via the belt tensioner (Clockwise
motion)
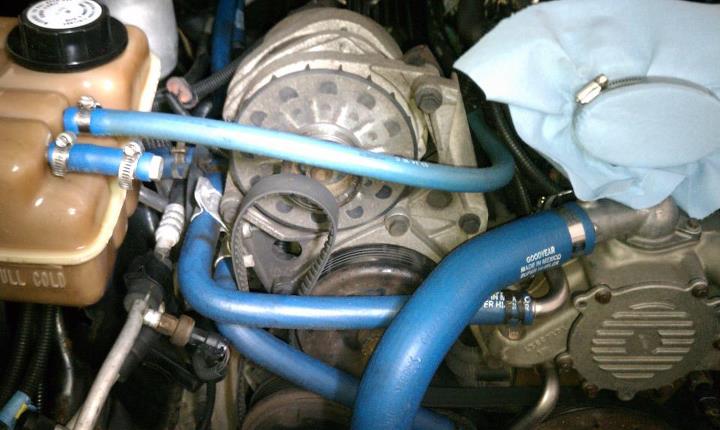
Then remove the alternator support brackets. Nothing exciting.
It connects behind the alternator right next to the plastic "T"
fitting for your coolant. There is another one right below the
electrical connection too.

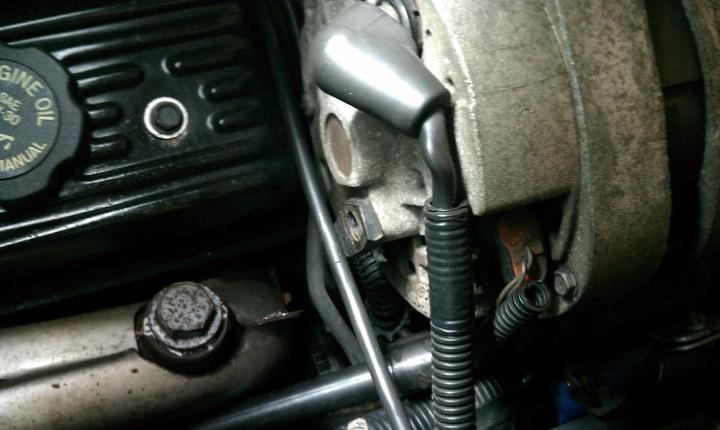
Pull off the electrical connection. There are two. O AND DISCONNECT
YOUR BATTERY!
There are 2 bolts that actually hold the alternator in place, pull
those suckers and yank that thing out of your way.
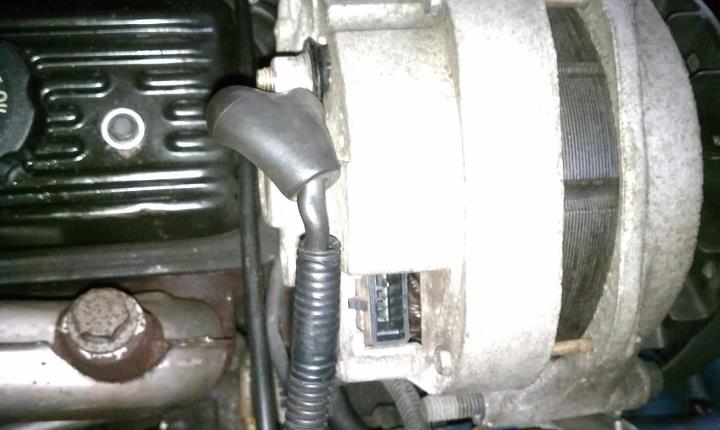
For those of you thinking, well... I'm not going to pull the
alternator... trust me, you are going to have to pull it and here is
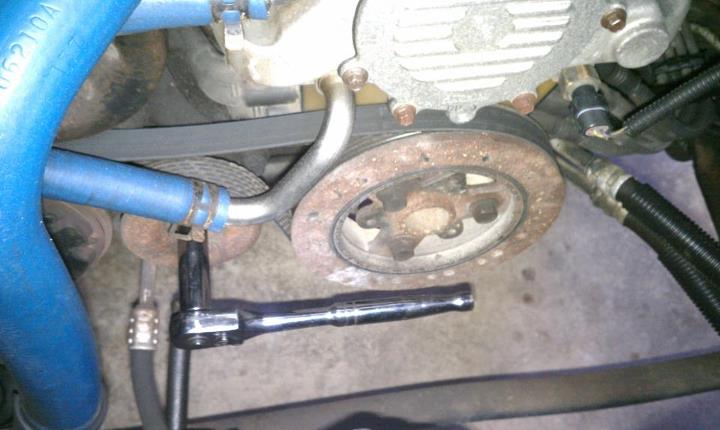
why. The front passenger manifold is impossible to get to with it on.
You can't use a regular socket because the bolt before the nut is too
long and you can't get a ratchet on it. You can barely get a deep
socket on it but then you have no room to get the ratchet on because
you are up against the control arm. I used a box end wrench and a
cheater bar. You can see in the pic below I removed the bolt about
3/4". And yes, you will think you can get a deep socket on that thing,
you can't trust me... TRUST ME!
The next 4 bolts were removed without any problems. So little effort
was taken and loosening them I didn't even bother with pictures. my
6th/back bolt was broken (yours probably is too!) but don't worry,
that is coming up.
Now that the manifold is loose from the block. Pull that thing out as
much as you can with still leaving a few threads in for the bolts.
Then crawl back under the car. Look at how much room you have now
(Sarcastic)!
But at least you can get a wrench on it!
Busted it loose with a 1/2" and some motivation, then used a 13mm
Speed wrench.
With that out, remove all of the manifold bolts and start wiggle and
gigglin' till it pulls out. Now you will be glad you removed the
alternator!
Now the Tri-Ys don't use the last bolt head like the manifolds do so
you can actually leave the broken bolt back there but I didn't like
that. You can see the bolt here above the EGR tube and to the left of
the exhaust port
After some PB Blaster I thought I would put 2 nuts on it and see if
that would work.
Nope!
So I got some Vicegrips, tightened down as hard as possible, prayed
and started twisting.

Result = Win

Figured getting this thing out was a good stopping point. Cleaned up
the gasket surface a bit and called it.
Next task - Spark plugs and wire replacement
Got the driver side done tonight, passenger side plugs changed.
Passenger side wires look like a MOFO getting them out of the opti.
Didn't realize you had so little room down there. Good thing I've got
small hands!
Just a reminder when you do your spark plugs to put anti-seize on the
threads and di-electric grease on both ends of the plug wires.
Don't forget about the 9th wire coming out of the top of the opti by
the driver side of the waterpump. I wondered why MSD shipped 10
cables. I guess another type of car uses the same kit but needs a
slightly different wire for one.
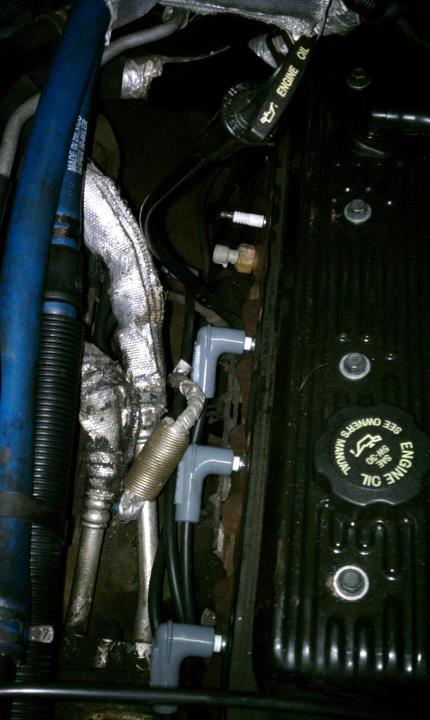
All the spark plugs and wires are installed. Holy cow is the passenger
side a PITFA! Even with the Manifold/header out of the way it was
insane. I'd rather do the ones on the ranger that involves taking off
the intake manifold!
When installing the passenger side header, make sure you put the oil
dipstick tube in the right place... or else you will have to dig it
back out, move the dipstick to the right spot, and then re-install.
Ask me how I know.
I found removing the temp sensor and the rear spark plug boot helped a
bit, also removing the oil cap and vent line helped too. It's pretty
tight but I installed the headers from the top, installing from the
bottom is a no go. You will think you will have to remove the
windshield wiper motor or at least loosen it, you don't. Removing the
plug to it does help though. You got to pitch it down at an angle and
slide it down. Getting it down under the window motor is the hardest
part. Don't worry about bending the oil dipstick, it will move.
Some of the exhaust bolts are a PAIN to get on. Not enough room to get
a socket on. it sucks, deal with it. Make sure you hook up the EGR
valve FIRST. Then come back and tighten down the manifold the rest of
the way. Don't forget to hook back up the spark plug and temp sensor.
Make sure your dipstick is in the right spot!
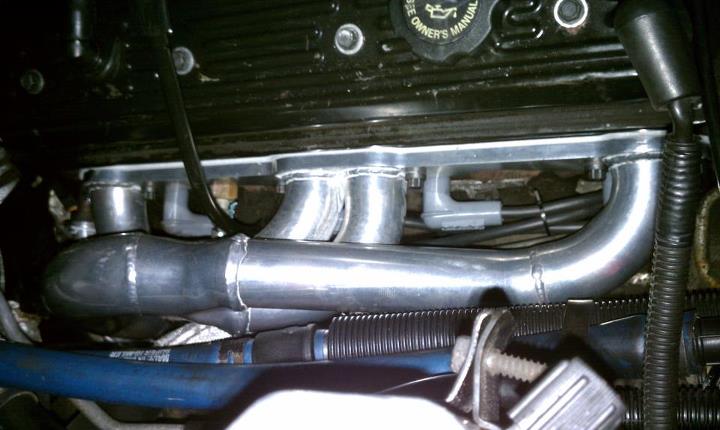
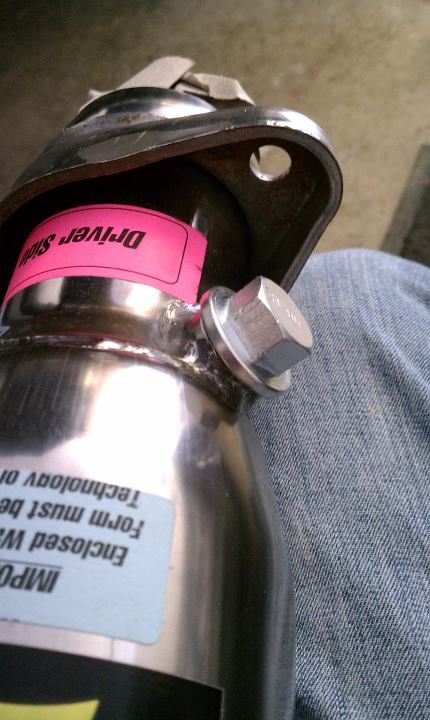
I was concerned about the cats not fitting but it really does stop at
the stock position.
Passenger side is complete, just have the driver side to do which
should be A LOT easier.
Well Driver side started off really good. Got 5 of the 6 bolts in.
Then the 2nd to last in the rear was a PITA... I had 0 Room to work
with.
Luckily I work at a steel fabrication shop and made this from a box
end wrench with an angle grinder and a cutting wheel.
Worked like a champ. I had just enough room to tighten a bit and
enough that the wrench didn't want to open up on me.
With the header clamped on nice and snug I was down to my o2 sensors
which came into from Amazon. Great price and free shipping $32.32 a
piece!
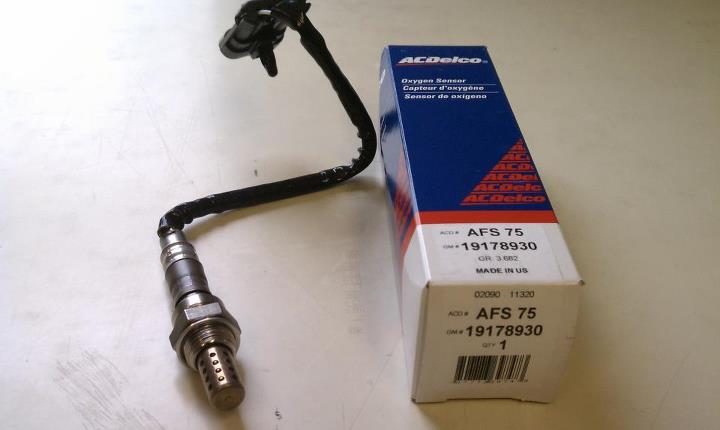
They kind of sucked to thread in but eventually got there.
Clamped everything up.
She cranked over and started right up. Sounds good. I found out after
doing a test run that I have a small exhaust leak from the back of the
cat. I need to adjust my pipes in the back a bit so things line up
better but then should be good.
Special thanks to GRAIL, Dad, Rat Rod, Dan @ Clear Image, and the ISSF
for your tips and suggestions through out. Engine bay pic when the sun
pops out.
Quote:
|
Originally Posted by
The Caretaker
Pretty good write up my
man.I think you could have saved some time by leaving the
manifolds and cats together and removing them as one
unit.Worked like a charm on my '94 b4u.Also, watch the A/C
line that runs the length
of the passenger side header over the top of the control arm.I
had to move mine a bit to make some clearance
and if you go too far it can rub through on the top of the control arm.
Ask me how I know
Aside from that enjoy the new noise and new found power!
|
VERY good point. Forgot to mention that but when I was talking to a
GRAIL member yesterday he told me about the A/C lines. From the top it
looks like they don't touch but looking through the passenger side
wheel, you could see the AC lines on the header! Very bad things
could have happened had I not checked. I've zipped tied that line
out of the way same with the spark plugs wires and o2 sensor wires.
Thanks for your comment as it is a safety concern!
I DID FAIL TO MOVE THE LOWER LINE. 10 Miles out and AC line
burnt through and threw Freon all over the place. PLEASE LEARN
FROM MY MISTAKE. CHECK ALL OF THE AC LINES AND MOVE THEM OUT OF
THE WAY!ASK ME HOW I
KNOW!!!!

Winning caption is "I think it dyed"
Going to have to add moving and wrapping the AC lines (THE LOWER ONE)
to my "Ask me how I know" list... |