|
Window Roller
Replacement
Source:
http://www.impalassforum.com/vBulletin/showthread.php?t=232364
By: B-Body Builder
Although this fix had been well documented before the crash, alot of
forum members have been posting with complaints about the infamous "Broken
Window Roller" problem. I decided to repost the entire fix process
for those who have not done this fix on any of their windows before:
Note - You can save this entire webpage including pics to
your PC for future reference with these steps:
1. Click "File" at the top of Internet Explorer,
then "Save As" from the menu.
2. Next to "Save as Type" boxselect "Web
Page Complete" in the menu, then "Save".
Problem - The Rear of your power window falls down out of
the track or sags when the window rolls up (Could be on any of the
4 doors).
Solution - Replace both original "Rectangular" shaped window
rollers with the newer style Round nylon rollers. It's nearly always
the rear window slider that breaks, But If you really want to do this
fix right, then replace BOTH Front and Rear sliders in the
window track while the doorpad is off!!! Rarely does the 3rd regulator
arm slider break in the lower track.
Parts for the fix:
(GM Parts)
(2) - 9666748 nylon Rollersand (4 or 5) - 10161510
Retainer Clips ( Door pad plugs for the Door Panel, depending on what
door your fixing).
Optional roller source:
(2) - nylon rollers: Dorman part # 74444 from
advanced auto parts or Rock Auto, NAPA.
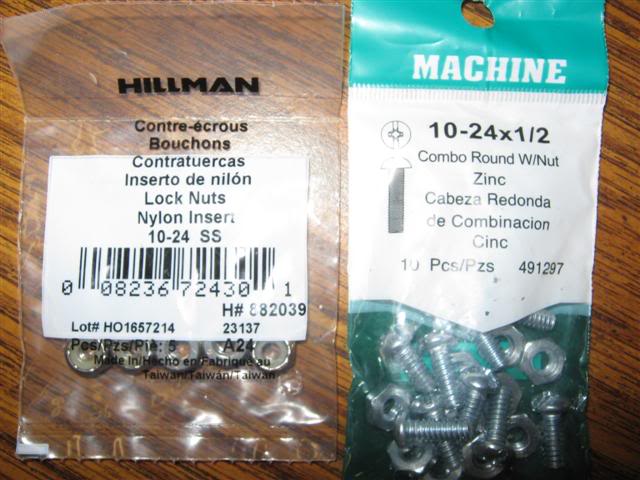
(6) - 3/16" aluminum rivets OR (6) - 10-24 x 1/2" Bolts
and (6) - 10-24 "Nylon Insert" locking nuts.
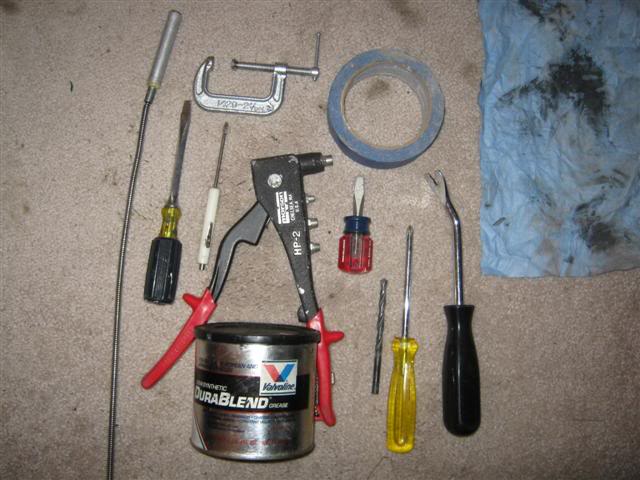
Tools for the project: (Will vary depending on What/How
your doing the project).
5/16" Drill bit, 2" C-Clamp, Door pad plug tool, Small
flat screwdriver, Short Stubby flat screwdriver, Phillips screwdriver,
Channel lock pliers, Hand rivet gun, 3/8" open end wrench (Only for
Nut/Bolt hardware method), Bearing grease, White spray lithium grease
(Can) Blue painters tape and a magnet tool (Just in case).
For this example, I will be fixing Both sliders on the
DS Rear door on my 95 Caprice. The process is similar on the
other doors as well. Remember, These doorpads, armrests and
switch panels are fragile......So take your time and go easy on them
when removing them!
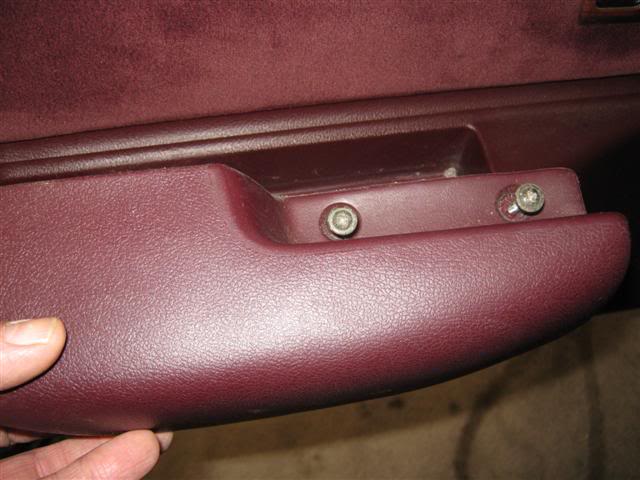
1. Remove the 2 screws that hold the armrest to the door, The
gently lift the back of the armrest up a small amount and
pull out and remove it.
2. Remove the screw in the center of the doorhandle pocket
(Behind the door handle). Then carefully insert a small flat
screwdriver in either end of the pocket and press in on the clip that
holds the pocket in, then pull out on the pocket until the clip clears
the doorpad - repeat on the other end of the pocket, Lift the pocket
out and over the door handle.
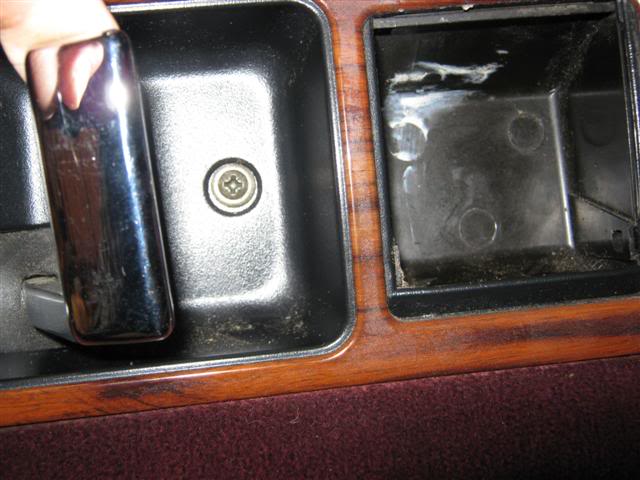
Door pocket clips on the ends

3. Remove the phillips screw in the doorpad at the bottom of
the back end of the doorpad
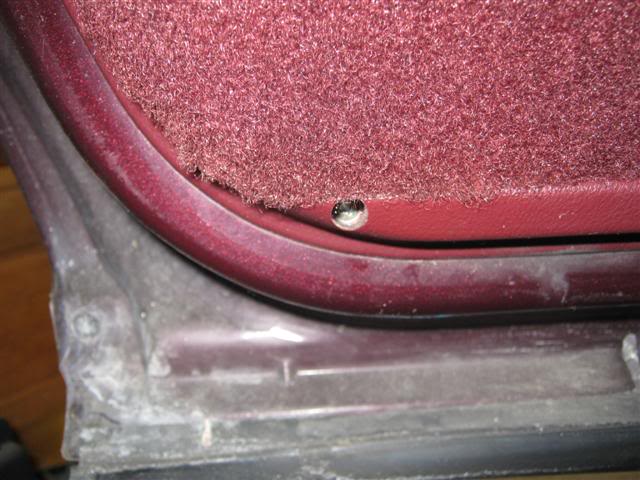
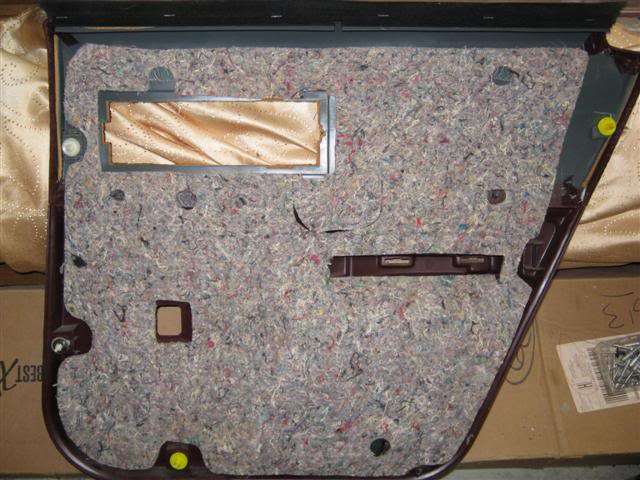
4. Using a good doorpad plug tool, locate the doorpad plugs (In
the doorpad pic). The gently pull out in an area close to rear of the
doorpad, and pop out the 1st doorpad plug with the tool.....Repeat
until all 4 doorpad plugs are removed from the door.
Now carefully grab the doorpad near the top on both ends and lift up
on the Rear of the doorpad 1st until the inside seal comes out
of the track, then lift up on the front end and gently work the
doorpad up and out of the doorframe.
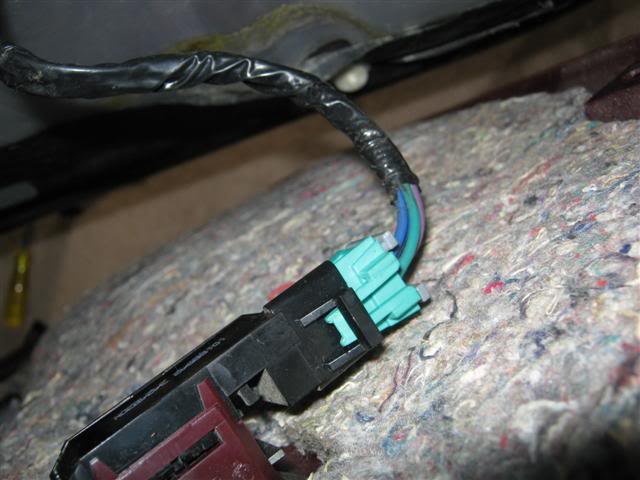
Remember, the Window switch still needs to be disconnected
before the doorpad can be removed completly! Remove the electrical
connector by pressing down on the light green tab, then pulling out on
the Connector (Not the wire harness) to the window switch,
whilke holding the switch in place in the doorpad. Now remove the
doorpad.
Doorpad plug locations - DS Rear door (Other doors similar).
Electrical connector for the window switch
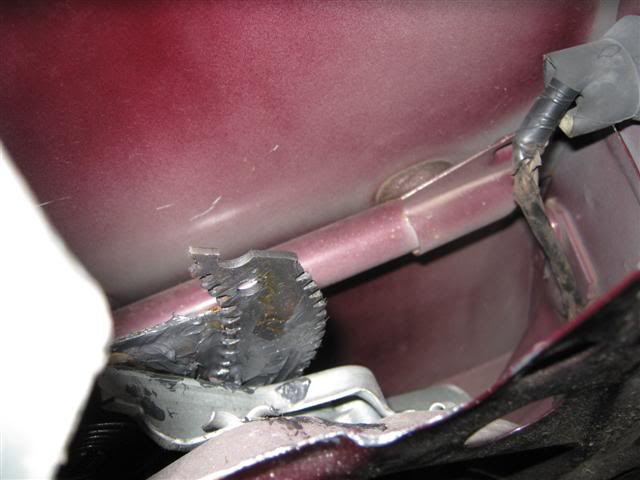
5. Now gently remove the plastic door paper from the inner door
and set it aside. Remove the window switch from the doorpad itself,
then temp hook the switch back up to the wire harness connector. Key
in the On position, slowly lower the window until you can see the
broken slider at the rear of the window track (Pic) thru the hole
behind the armrest bracket.
Note: Step 5 also involves removing the arm rest
bracket for greater access to the rear window roller area as
explained below. This step is optional! Some people do it, some
dont. If you dont intend to remove the armrest bracket....Skip
to step 6
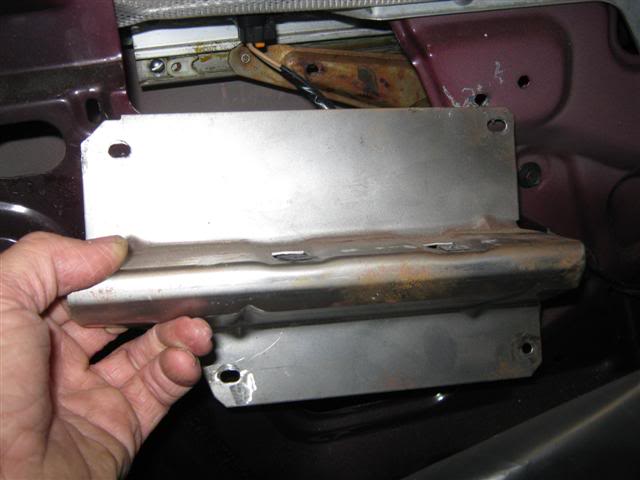
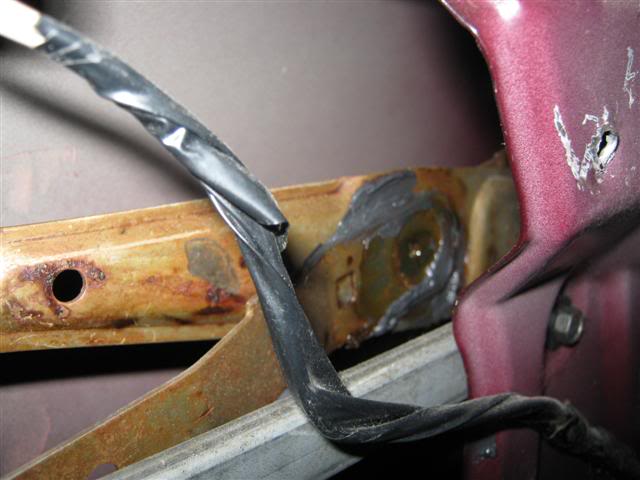
Stuff and old towel into the bottom of the inside of the door (To
catch rivets and debris) and using a 5/16" drill bit.....Drill
out just the center head of all 4 armrest bracket rivets, dont go any
deeper - all you want to do here is just remove the rivet head. Gently
tap out the rivets, then remove the bracket and set aside.
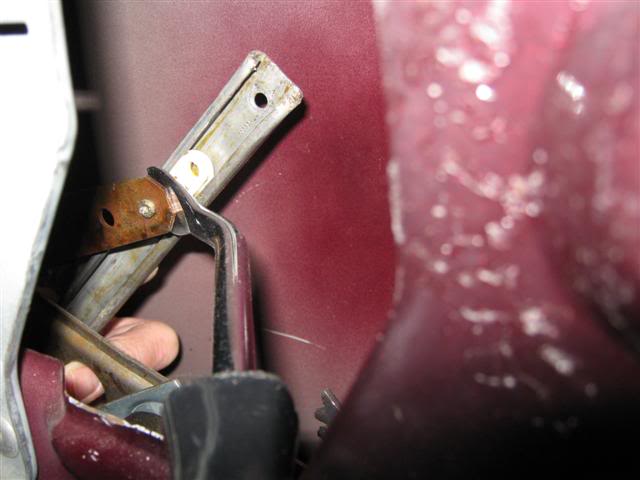
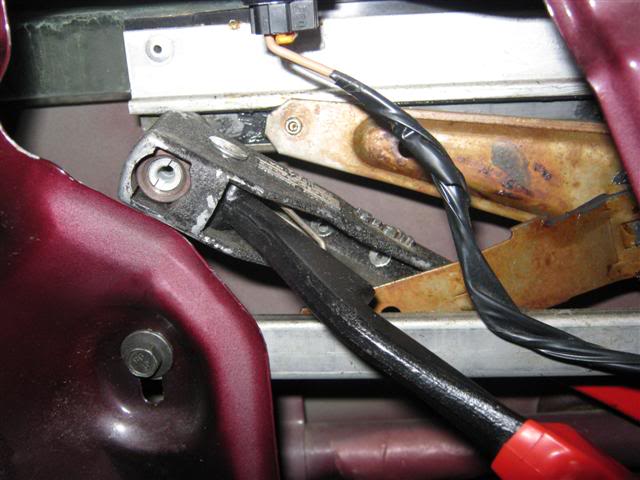
Broken rear slider (From a previous repair, you can see they used
bolts/nuts instead of rivets in the ends of the window track for the
repair)
6. In the pic above, Notice that the end of the track is
crimped in slightly. These crimped in areas must be opened enough in
order to get the old sliders out of the track, and the new round
rollers in the track. Using a large flat stubby screwdriver, stick it
in the rear of the track and pry open the crimped areas until the
broken slider can be slid out and removed.
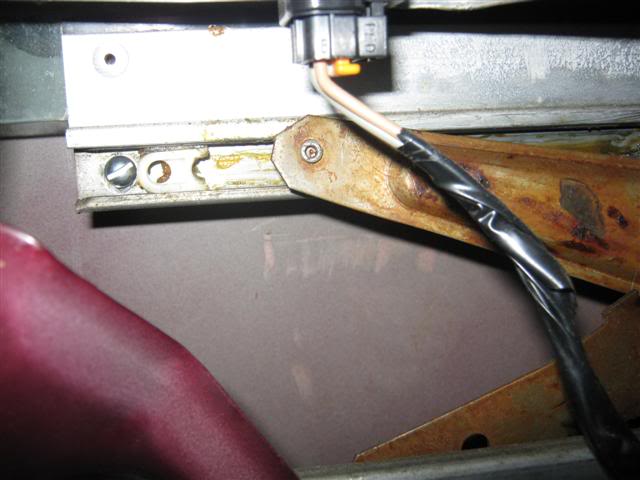
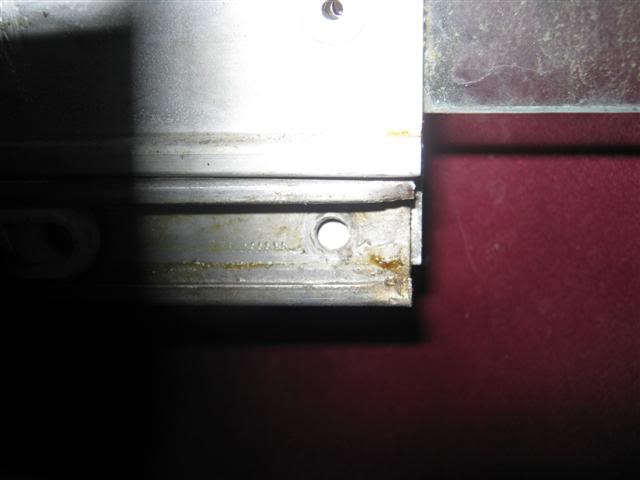
If you are replacing both front and rear sliders in the fix, then it
is easier to drill out Both rivets in the ends of window slider track
using a 5/16" drill bit, and removing the track from the window
and door itself. Do this After you have uncrimped the rear of
the track. You will have to slowly raise/lower the window in order to
gain access to the rivets. My vehicle had been fixed in the past on
this window so they used nuts and bolts in the track instead of rivets
for the fix (Pic).
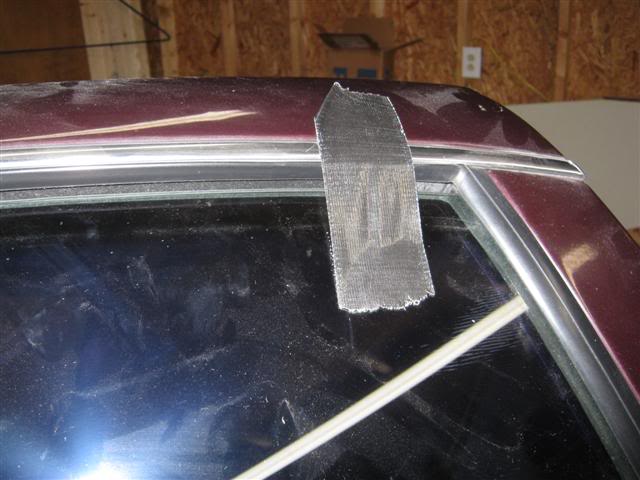
7. Once the 2 rivets have been drilled out of the track, Get a
roll of the "Blue Painters Tape" and by hand, lift the window up from
the inside and outside of the door until it reaches the top, then tape
the top of the window to the door frame to hold it up. Better to use
the blue tape (Comes off easier with no leftover adhesive).....I
didn't have any on hand!
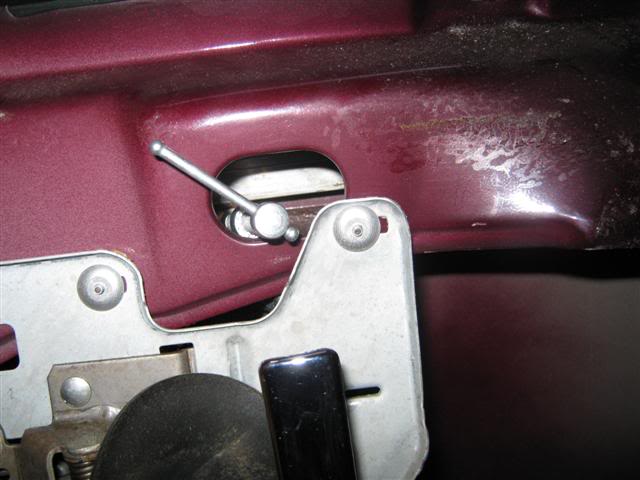
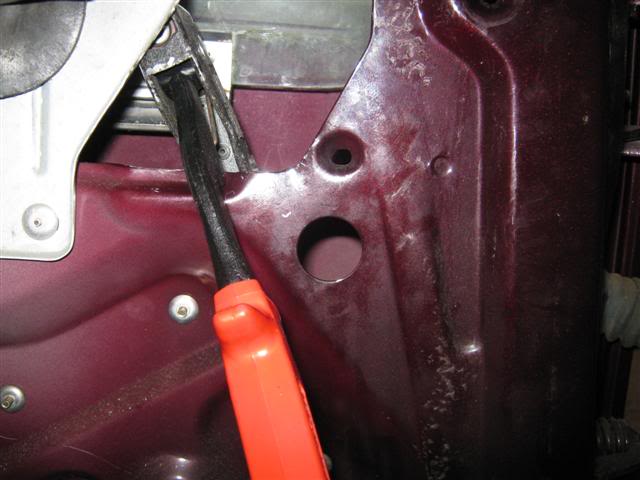
8. Now you'll see that the track is free of the window, and
ready to be removed from the door, but 1st you need to pop the
remaining good slider out off the ball stud at the front. Use your
doorpad plug tool and carefully apply pressure to the slider until it
pops out the ball stud (Pic). After closer inspection, My front slider
had also already cracked in 1 spot, and needed to be replaced. Now
guide the slider track out if the rear hole of the door.
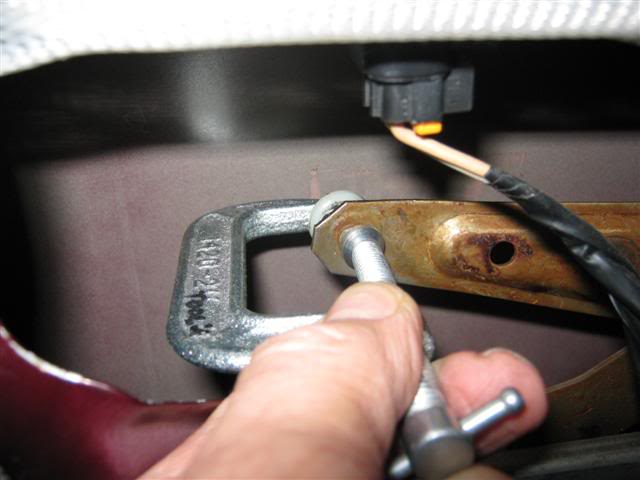
9. Now get some bearing grease and apply a small amount to the
center holes of the new round rollers, then using a 2" C-Clamp,
carefully align the C-Clamp, roller and ball stud of the rear
regulator arm up, and slowly tighten the C-Clamp down until the roller
pops onto the ball stud.
10. Repeat the process on the Front ball stud. This one is a
bit harder, but can be accessed by "Carefully" lifting the regulator
arm with the window switch toward the top of the door until you align
the access hole in the pic below. The clamp will need to be slid into
the inside of the door, but it will fit and work. Paitence on this
one!
11. Remove the old sliders from the slider track, wipe the
track clean of any debris and old grease. Get your grease again and
apply a thin new layer to the inside of the slider track where the
rollers go. This is also a good time to lubricate the
regulator sprocket and scissors arms area where they cross, and also
grease the lower scissors arm track where the 3rd window door
slider rides in. Also a good time to spray some white grease
lubricant into the lock arm connections, face lock and lock mechanism
parts that are on this inside of the rear door while the doorpad is
off! Any lock rods that were knocked off or adjustments needed to be
made - Fix them now too!
12. Now insert your slider track back into the rear hole in the
door, insert the rear round slider into the track, then guide the
track thru the door and onto the front slider. If needed, the track
Can be rotated to get both sliders onto it, but if you opened both
crimped ends of the track, you wont have to do this.
13. Once the track is back onto both sliders, Carefully remove
the Blue tape that hold the window up While holding the window
in place so it wont fall! Now slowly lower the window until you can
align the slider track back up with the holes in the window track.
You'll likely have to slide the track L or R to line the holes up
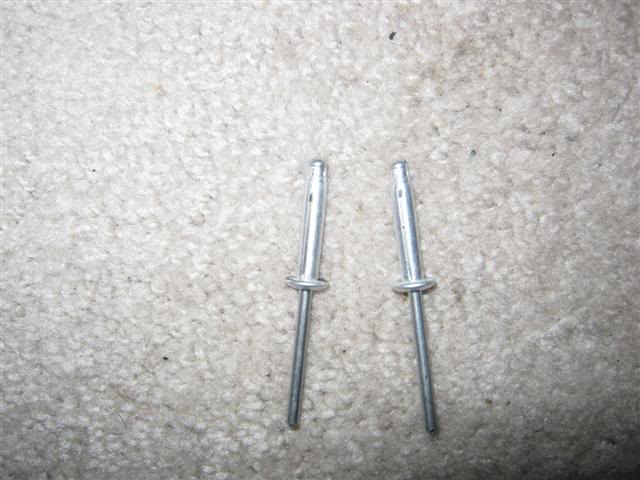
14. Now this part of the fix is your option. You can use
3/16" aluminum rivets to re-attach the slider track to the the
window frame, or you can use 10-24 x 1/2" Bolts and 10-24
"Nylon Insert" locking nuts for the job. I used the rivets because
I prefer the more permanant fix (Cant come loose) effect of rivets
but, the locking nuts should work too. The regular nuts on the prior
fix on my door were starting to come loose when i did the
job.....Locking nuts are a must here!
15. The rivets are kinda tough to get installed in the track,
but I managed to get a hand riveter in both places in the door but
Again, I had to "Slowly" adjust the window Up/Down to get the position
just right to do it. Do the Rear hole 1st if you are using
rivets on this fix.
Rear Rivet
Front Rivet
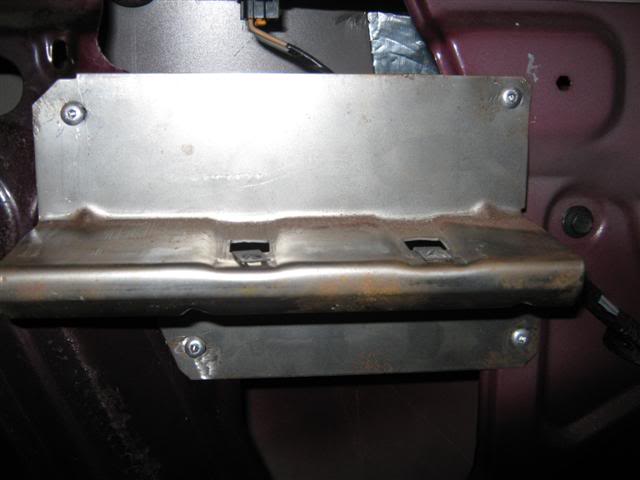
16. Once the Slider track is re-attached to the window frame at
both ends, It's time to check your work and see if the new sliders are
working and the window rolls up properly? If all is good, It's time to
re-install the armrest bracket to the door. Again, you can use the
3/16" aluminum rivets or the 10-24 x 1/2" Bolts and 10-24 "Nylon
Insert" locking nuts for the job.
It's your call. I again used the rivets.
17. Once the bracket is back on.....Carefully remove the
Towel you stuck into the bottom of the door to catch debris (Or
nuts the you dropped). Have a magnet or shop-vac handy in case you
need it and DONT leave any metal in the door that can rattle around
while your driving.
18. Now remove the window switch from the harness connector
again. Time to re-apply the plastic door paper to the door. Personally
I use a "Electric hot glue gun" and the clear glue, start at the top
of the door and apply the whole top area 1st. It should be easy to
tell where the plastic was before....just re-apply it. Once the top is
in place, apply the rear area, then the front area. Now slide the
electrical harness for the window switch thru the hole in the plastic,
then glue the lower section down to the door
Note: Some people use tape rather than glue to re-apply the
plastic......Again, it's your call but the glue works best and a more
professional job IMO.
19. The rest of the fix is basically reverse order: Install the
window switch back into the door pad, Make sure ALL the door pad plugs
are Good and installed (I use all NEW plugs because they keep the door
pad tight on the door). Also, make sure the deadner carpet is still
fixed to the doorpad? If not, use the glue gun to stick it back on.
20. Get the doorpad close to the door, then hook the electrical
connector to the window switch back onto the switch.
Carefully lift and tilt the top of the door pad window seal into the
top door track, then install the pad back into the track, paying close
attention that the doorpad is fitted down in both ends of the door.
21. Now align the doorpad plugs (1 at a time) and pop them back
into their holes, then re-install the phillips screw at the rear of
the doorpad.
22. Slide the door handle pocket back over the doorhandle, then
pop the pocket back into the doorpad and re-install the phillips
screw.
23. Re-Install the arm-rest and both phillips screws that hold
it on.............Your done!
Note: The front doors and thr RS rear are nearly the same process as
the LS Rear sliders, but once you've done 1 door with no problems, the
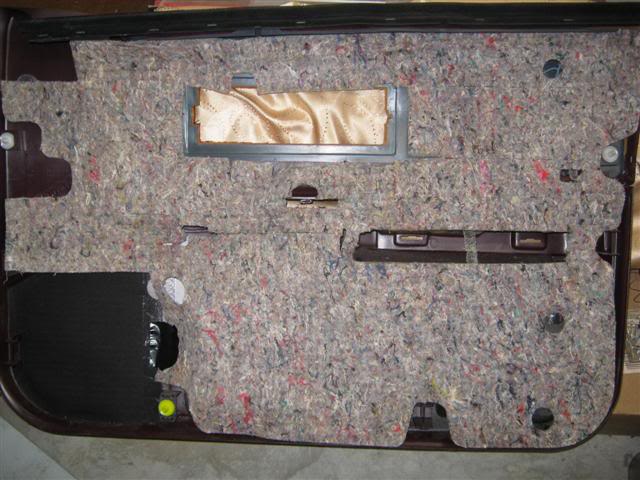
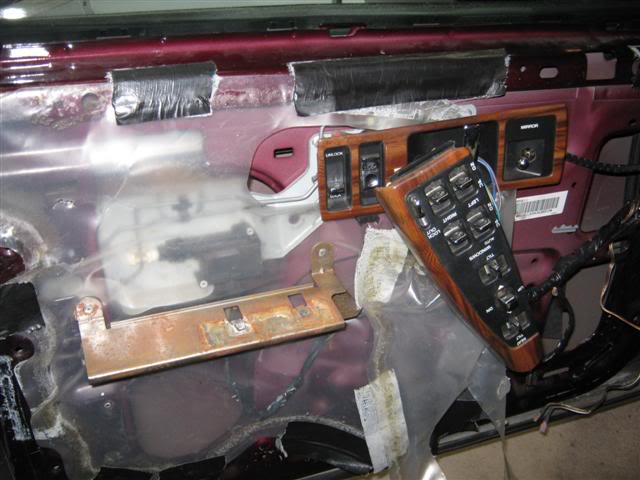
others will be easier. Here's a couple of pics of the LF (Drivers)
doorpad and doorframe for reference......I just started this fix this
week!....
Drivers Side Door pad
Drivers Side Door
 |
|